ziyao, song

PXE Remote Maintenance

PXE Remote Maintenance: Complete Network Boot Guide

PXE Remote Maintenance: Complete Network Boot Guide Announcements Buyer Guide Comprehensive Tips Occasion Product Review Q&A Tutorials Remote maintenance is essential for IT teams, especially when managing multiple devices across locations. However, many professionals face critical challenges when dealing with unbootable systems or bare-metal machines. PXE remote maintenance solves this problem effectively.It allows you to boot and maintain computers entirely over the network, without relying on local storage like hard drives or USBs. What Is PXE? PXE stands for Preboot Execution Environment. It is a network boot standard developed by Intel. Simply put, PXE lets your computer start directly from its network card, before loading the local operating system.This is the core advantage of PXE remote maintenance. Even if a computer’s hard drive is completely failed or corrupted, you can still boot into a maintenance system over the network. Core Components of PXE PXE relies on three essential services working together: DHCP Server: Assigns IP addresses to clients and tells them where to find the boot server TFTP Server: A lightweight file transfer protocol for sending small boot files Boot Files: Special files that load the maintenance system kernel and environment Common Problems & Deep Troubleshooting Guide While PXE is powerful, it has specific requirements that often cause failures. Below are the most common issues with technical solutions and measurable troubleshooting steps. 1. Critical DHCP Configuration Errors This is the #1 cause of PXE boot failures. PXE requires specific DHCP options that most default DHCP servers do not enable.Critical Note: If your network uses VLANs or multiple subnets, PXE broadcasts will not cross routers by default. You must configure DHCP Relay (IP Helper) on your layer 3 switches to forward PXE requests to your PXE server. 2. Network Connectivity Issues PXE is extremely sensitive to network latency and packet loss. For reliable operation: Ensure client and server are on the same subnet (or DHCP Relay is properly configured) Use Gigabit Ethernet (10/100Mbps works, but is much slower) Test network connectivity with ping -t 192.168.1.100 from another machine Check for duplicate IP addresses on the network 3. Legacy vs UEFI Boot File Mismatch This is a very common mistake. Modern computers use UEFI instead of the old Legacy BIOS, and they require completely different boot files. Using the wrong file will cause PXE boot to fail silently. 4. Firewall Blocking TFTP Traffic TFTP uses UDP port 69. Most operating system firewalls block this port by default. You must explicitly allow TFTP traffic on your PXE server. How to Check If Your Computer Supports PXE Before setting up PXE, confirm that your target computers support network boot. Here are the accurate methods for Windows and Linux systems. Check via BIOS/UEFI This is the only 100% accurate method: Restart your computer Press the boot menu key during startup (usually F2, F10, F12, or Del) Look for options labeled: Network Boot PXE Boot LAN Boot IPv4 PXE / IPv6 PXE If you see any of these options, your computer supports PXE. If not, it does not have native PXE support. Check via Device Manager (Windows) Right-click the Start menu and select Device Manager Expand the Network adapters section Right-click your Ethernet adapter and select Properties Go to the Advanced tab Look for properties related to: Wake-on-LAN Network Boot PXE Support If these options exist, your network card supports PXE. Check via Terminal (Linux) Open a terminal window First, identify your network interface name:baship link show Then use ethtool to check for PXE support (replace eth0 with your interface name):bashsudo ethtool eth0 Look for the “Wake-on” line. If it shows g (Wake on MagicPacket) Or mentions PXE, your card supports network boot. Step-by-Step PXE Remote Maintenance Setup This guide uses the most popular and easiest tools for PXE server setup. We recommend Tiny PXE Server for Windows or dnsmasq for Linux, as they combine DHCP and TFTP in a single package. Step 1: Prepare the Server Environment Prerequisite: Your PXE server must have a static IP address. Dynamic IP addresses will break PXE functionality. Assign a static IP to your server (e.g., 192.168.1.100) Disable any other DHCP servers on the same network (conflicts will cause failures) Download and install your chosen PXE server software Configure the DHCP server with the critical options from the table above Step 2: Place Correct Boot Files & Maintenance Images Critical: Choose the correct boot file based on your client’s boot mode. Client Boot Mode Required Boot File Legacy BIOS (old computers) pxelinux.0 Modern UEFI (64-bit) bootx64.efi or ipxe.efi UEFI (32-bit, rare) bootia32.efi Place the appropriate boot file in the root directory of your TFTP server Download a maintenance system image (WinPE for Windows, Clonezilla for disk cloning, or a Linux rescue image) Extract the entire contents of the ISO image to a subdirectory in your TFTP root Update your PXE configuration file to point to the correct kernel and initrd files Step 3: Configure Client BIOS/UEFI Boot Priority Restart the target computer you want to maintain Press the BIOS/UEFI key during startup (F2, F10, F12, or Del) Navigate to Advanced > Network Stack Set PXE Boot or Network Boot to Enabled Go to the Boot menu Set Network Boot (LAN) as the First Boot Priority Save changes and exit BIOS/UEFI Step 4: Boot Into Maintenance System & Perform Operations The client computer will now automatically start the PXE boot process It will send a DHCP broadcast request Your PXE server will respond with an IP address, TFTP server address, and boot file name The client will download the boot file from the TFTP server The boot file will load the maintenance system kernel and environment Once booted, you can perform any maintenance tasks: Reinstall the operating system Clone or backup hard drives Repair corrupted system files Scan for viruses and malware Reset forgotten passwords What If Your Computer Doesn’t Support PXE? Many consumer laptops and some modern ultrabooks have PXE disabled by default or removed entirely. Here are the solutions: USB PXE Boot: Create a special USB drive

PXE Remote Maintenance: Complete Network Boot Guide Read More »

Can Mini PC Use External GPU?

Can Mini PC Use External GPU? Announcements Buyer Guide Comprehensive Tips Occasion Product Review Q&A Tutorials If you own a Mini PC, you may often wonder: Can a Mini PC use an external GPU (eGPU)?The answer is yes.An external GPU is a game-changer for Mini PC users who need better graphics performance.Unlike internal GPU upgrades, eGPU is practical and flexible.It helps Mini PCs break through graphics limitations without changing the device itself. 1. Requirements for Using an External GPU with Mini PC Not all Mini PCs can connect to an external GPU.You need to meet specific requirements to ensure smooth operation.Here are the key conditions you must check first. Compatible Ports The most critical requirement is a compatible port on your Mini PC.Without the right port, an external GPU cannot work.The recommended ports are Thunderbolt 3, Thunderbolt 4, USB4, or OCuLink.These ports support PCIe tunneling, which is essential for eGPU connectivity.Note that a regular USB-C port is not enough.It does not support PCIe tunneling and cannot transmit the large amount of data required by an external GPU. Comparison of Different eGPU Ports Different eGPU ports vary in bandwidth, performance loss, and use cases.Understanding their differences helps you choose the right one for your Mini PC.Below is a clear comparison of the most common eGPU ports: Port Type Bandwidth Typical Performance Loss Hot Plug Support Compatibility Best For Thunderbolt 3 40Gbps 15-20% Yes Most modern Mini PCs and eGPU enclosures General use, casual gaming Thunderbolt 4 40Gbps 10-20% Yes Newer Intel-based Mini PCs Gaming, video editing, professional work USB4 20-40Gbps 15-25% Yes Budget-friendly modern Mini PCs Casual users, light productivity OCuLink (PCIe 4.0 x4) 64Gbps <5% No High-end performance-focused Mini PCs 3D rendering, AI training, competitive gaming BIOS/Firmware Compatibility Even if your Mini PC has a compatible port, you need to ensure its BIOS or firmware supports eGPU.First, update your Mini PC’s BIOS and system to the latest version.This avoids recognition issues between the Mini PC and the external GPU.For Intel-based Mini PCs, enable VT-d/IOMMU technology in the BIOS.This optimizes data transmission and ensures stable operation. Supporting Hardware You need three key hardware components to use an external GPU with your Mini PC.First, an eGPU enclosure.It has a PCIe slot, an independent power supply (300-700W), and a cooling system.Second, a desktop graphics card.Choose a model with power consumption ≤350W based on the enclosure’s power supply.Third, a high-quality connection cable.Use the cable that comes with the eGPU enclosure to ensure stable data transmission. System Requirements Windows 10 or 11 is the best choice for eGPU compatibility.Most eGPUs work seamlessly with these systems.Some Linux distributions support eGPUs, but they require additional configuration.It is not recommended for beginners. 2. Benefits of Using an External GPU with Mini PC Using an external GPU with your Mini PC brings many practical benefits.It solves the problem of poor graphics performance of Mini PCs.At the same time, it retains the advantages of Mini PCs, such as compact size and portability. Boost Graphics Performance Significantly Most Mini PCs rely on integrated graphics, which are only suitable for daily office work and video playback.With an external GPU, your Mini PC can handle 3D rendering, video editing, and even 1080p/1440p gaming.It meets the needs of professional users and gamers.From practical testing, OCuLink offers the lowest performance loss (less than 5%) for eGPU, while Thunderbolt 4 has a loss of 10-20%. Flexible Upgrade and Cost-Saving Unlike internal GPU upgrades, you don’t need to replace the entire Mini PC to upgrade the external GPU.When your graphics needs increase, you only need to replace the graphics card or eGPU enclosure.This saves money in the long run. Retain Mini PC’s Portability Mini PCs are loved for their compact size and light weight.An external GPU is a separate device.You can disconnect the eGPU when you need to carry the Mini PC.When you are at home or the office, connect it to get powerful graphics performance. Support Multi-Monitor Setup Most eGPU enclosures have multiple video output ports, such as HDMI and DisplayPort.This allows your Mini PC to connect multiple monitors at the same time.It improves work efficiency for office and design users. 3. Step-by-Step Guide to Set Up External GPU for Mini PC Setting up an external GPU for your Mini PC is not complicated.Follow these simple steps, and you can use it smoothly. Step 1: Check Compatibility Again Before starting, confirm your Mini PC has a Thunderbolt 3/4, USB4, or OCuLink port.Update the BIOS and system to the latest version.This avoids recognition failures. Step 2: Prepare All Hardware Gather your Mini PC, eGPU enclosure, desktop graphics card, connection cable, and monitor.Install the graphics card into the eGPU enclosure.Connect the enclosure’s power supply and ensure it is properly fixed. Step 3: Connect the Devices The connection process differs slightly depending on your port type.For Thunderbolt 3/4 and USB4: You can safely plug the cable into your Mini PC even if it is powered on.For OCuLink and M.2 solutions: Fully shut down your Mini PC first. OCuLink does not support hot plugging. Connecting while powered on may cause system crashes or hardware damage.Use the dedicated cable to connect the eGPU enclosure to the compatible port of your Mini PC.Connect your monitor to the video output port of the eGPU enclosure. Step 4: Power On and Install Drivers First, turn on the eGPU enclosure.Then turn on your Mini PC (if you are using OCuLink).The system will detect the new hardware immediately. No need to wait several minutes.Download and install the latest graphics card driver from the official website of NVIDIA or AMD.Restart your Mini PC after the driver installation is complete. Step 5: Set the Default GPU Right-click on the desktop and select “Display Settings” (Windows 10/11).Find “Graphics settings” and select the apps or games you want to run with the external GPU.Set the external GPU as the default graphics processor.Save the settings and restart the app. FAQ Q: Can I use an NVIDIA external GPU with an AMD Mini PC? A: Yes, you can. The compatibility depends

Can Mini PC Use External GPU? Read More »

DP vs HDMI

DisplayPort vs HDMI: Ultimate Showdown 2026 – Which One Should You Choose?

DisplayPort vs HDMI: Ultimate Showdown 2026 – Which One Should You Choose? Announcements Buyer Guide Comprehensive Tips Occasion Product Review Q&A Tutorials If you’ve ever bought a monitor, graphics card, Mini PC, or TV, you’ve probably seen two common ports: DisplayPort (DP) and HDMI.Many people mix them up. They look similar, but they’re designed for different purposes.This guide breaks down the key differences between DisplayPort and HDMI in simple terms.It also helps you choose the right one for gaming, work, home theater, or multi-monitor setups – no technical jargon required. What Are DP and HDMI? First, let’s get the basics right. Both DP and HDMI are digital ports. They transmit video and audio from your device (like a PC or console) to a display (like a monitor or TV).But their design goals are totally different. DisplayPort (DP): Made for PCs and Professionals DisplayPort is developed by VESA (Video Electronics Standards Association).It was created specifically for computers, monitors, and professional setups.DP is royalty-free, which means manufacturers don’t need to pay fees to use it.It’s known for high performance and advanced features for PC users. In 2026, DisplayPort is mainly available via USB-C ports through DP Alt Mode.Thunderbolt 4, which is widely used in laptops and Mini PCs, also natively supports DisplayPort. It can transmit DP signals through USB-C ports, making it easier to connect external displays.DP Alt Mode turns a USB-C port into a DisplayPort port. This is a game-changer for thin laptops and Mini PCs, which often have limited dedicated ports. It allows a single USB-C port to handle video, audio, and data transfer at the same time. HDMI: Made for Home Entertainment HDMI (High-Definition Multimedia Interface) is managed by the HDMI Licensing Administrator. It was designed for consumer electronics: TVs, game consoles, projectors, and set-top boxes. HDMI has wide compatibility. It’s the standard for home theaters and entertainment systems.Unlike DP, manufacturers need to pay licensing fees to use HDMI ports. Key Specs Comparison: Version Matters More Than Port Type A common myth: “DP is always better than HDMI.” That’s not true.The performance depends more on the version of DP/HDMI than the port itself.Below is a simple comparison table of popular versions (2026 update): Port Version Max Bandwidth Max Resolution/Refresh Rate (Uncompressed) Key Features DP 1.4 32.4 Gbps 8K@30Hz / 4K@120Hz DSC Compression, HDR10, MST DP 2.0 80 Gbps 8K@60Hz / 4K@240Hz Higher Bandwidth, Enhanced DSC DP 2.1 (UHBR20) 80 Gbps 8K@120Hz / Dual 4K@144Hz UHBR20, Uncompressed 8K, Dual-Screen Support HDMI 2.0 18 Gbps 4K@60Hz / 2K@144Hz HDR, 21:9 Widescreen HDMI 2.1 48 Gbps 8K@60Hz / 4K@120Hz eARC, VRR, ALLM, DSC 1.2 Note: DSC (Display Stream Compression) is a game-changer for DP.It lets DP deliver higher resolution and refresh rates without losing image quality.Even DP 1.4 can reach 4K@240Hz with DSC. Importantly, HDMI 2.1 also supports DSC 1.2 – it can also achieve 4K@240Hz or higher when DSC is enabled. Key Feature Differences: Beyond Resolution Besides resolution and refresh rate, DP and HDMI have unique features.These features decide which one is better for your needs. Multi-Monitor Support: DP Daisy Chain vs Direct Connection This is a common confusion for many users, especially Mini PC owners.Let’s break it down clearly.First, direct connection: If your Mini PC has multiple HDMI and DP ports, you can plug one monitor into each port.This is the most common and stable way to set up multiple monitors.Each port is an independent video channel. It won’t share bandwidth, so 4K or high-refresh-rate content stays smooth.Second, DP MST Daisy Chain: This is a backup option for devices with only one DP port (like thin laptops).To use it, your monitors need both a DP IN (input) and a DP OUT (output) port.You connect your PC to the first monitor’s DP IN, then the first monitor’s DP OUT to the second monitor’s DP IN.This way, one DP port on your PC can support 2-3 monitors.In contrast, HDMI does NOT support daisy chaining.One HDMI port can only connect to one monitor – no exceptions.For Mini PCs with multiple ports, you’ll never need DP daisy chaining. Direct connection is better. Audio Features: eARC for Home Theaters Both DP and HDMI can transmit multi-channel audio.But HDMI has a big advantage for home theaters: eARC (Enhanced Audio Return Channel).eARC sends high-quality, uncompressed audio from your TV back to your soundbar or AV receiver.DP does not support eARC. It’s fine for PC audio, but not ideal for home theater setups. Gaming Features: VRR and Compatibility Both ports support VRR (Variable Refresh Rate) to reduce screen tearing.But DP has better compatibility with G-SYNC and FreeSync (popular gaming technologies).It also has lower latency, which is better for competitive gaming.HDMI 2.1 supports VRR, too, but some devices have compatibility issues. Physical Design: Lock vs No Lock DP ports have a small latch (lock). It keeps the cable securely connected.This is great for desktops or monitors that don’t move often.HDMI ports have no latch. The cable stays in place with friction only.It’s easier to plug and unplug, but it can come loose if you move the device. Scenario-Based Guide: Choose the Right One for You The best port depends on your device and how you use it.Here’s a simple guide for 2026: For Gaming If you have a high-refresh monitor (144Hz+), use DP.DP 1.4, 2.0, or 2.1 will unlock the full refresh rate of your gaming monitor. DP 2.1 (UHBR20) is now standard on high-end graphics cards, supporting uncompressed 8K@120Hz.If you play on a console (PS5, Xbox Series X/S) and a TV, use HDMI 2.1.It’s the only way to get 4K@120Hz and VRR for console gaming. For Professional Work (Design, Video Editing) Choose DP. It has higher bandwidth and more stable color transmission.4K/8K professional monitors work best with DP 2.0 or DP 2.1. DP 2.1 (UHBR20) supports uncompressed 8K@120Hz or dual 4K@144Hz, ideal for high-end professional work.It ensures accurate colors and smooth performance for editing or design work. For Home Entertainment (TV, Projector)  Use HDMI. It’s the standard for TVs, projectors, and set-top boxes. HDMI 2.1 is perfect for

DisplayPort vs HDMI: Ultimate Showdown 2026 – Which One Should You Choose? Read More »

HYSTOU K4 Dual LAN Ports Mini PC

Why You Need a Dual Ethernet Port Mini PC: 5 Game-Changing Scenarios (2026 Guide)

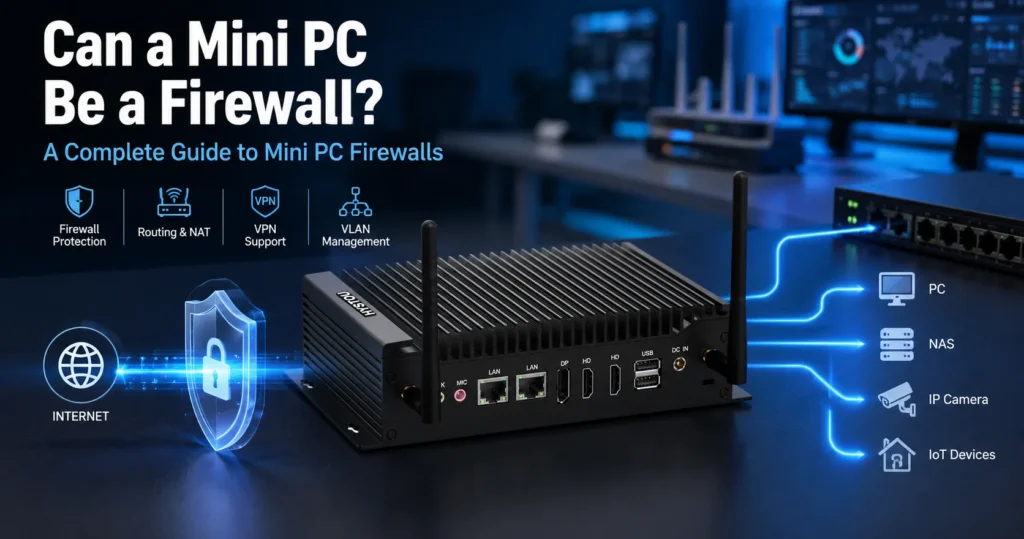
Why You Need a Dual Ethernet Port Mini PC: 5 Game-Changing Scenarios (2026 Guide) Announcements Buyer Guide Comprehensive Tips Occasion Product Review Q&A Tutorials Single-Ethernet-port Mini PCs were once enough for basic internet needs. But as work and life become more digital, they can no longer keep up. Many users face frustrating problems: data leaks, unexpected network outages, slow file transfers, and constant cable plugging and unplugging.This is where dual-Ethernet-port Mini PCs come in. They solve these pain points with practical functions and stable performance. What is a Dual Ethernet Port Mini PC? A dual Ethernet port Mini PC is a compact computing device with two independent wired network ports. Unlike single Ethernet port models, it can connect to two different networks at the same time.It is small in size, energy-saving, and efficient. It is widely used in industrial, office, home, and other fields. The real value of this device lies in solving the practical pain points that single-port devices cannot solve. Core Functions of Dual Ethernet Port Mini PC The two Ethernet ports of the device are independent of each other and do not interfere with each other. Each function targets specific user pain points. We also add key hardware standards to help you choose the right model. Network Isolation: Your Digital Security Barrier If you use a single Ethernet port device, your internal network (such as industrial control systems, office servers, or monitoring data) must share the same network as the external internet. This exposes core data to cyber risks like hacking and data leaks.One Ethernet port connects to the external network (router or optical modem) for normal internet access. The other connects to the internal network (switch, camera, industrial equipment, or office intranet).This physical isolation ensures that internal data is not exposed to the external network. It forms a solid firewall for your data security. This architecture is ideal for running virtualization platforms like pfSense or Proxmox, enabling enterprise-level network control.Hardware tip: For high stability, choose models equipped with Intel i225/i226 network cards (such as i226-V). These cards are favored by the industry for their low latency and compatibility with high-speed 2.5GbE networks. Network Link Backup: Uninterrupted Network for Key Tasks A single Ethernet port device will go offline immediately if the network cable is disconnected or the network fails. This is disastrous for key tasks like industrial production, live streaming, and store cash registers.You can connect both Ethernet ports to the same router or network. If one network cable is disconnected or fails, the other will automatically take over.It ensures that your device will not go offline. This function is very important for key businesses that cannot afford network interruption. Bandwidth Aggregation: Faster Data Transmission Single Ethernet port devices (usually 1Gbps) are slow when transferring large files (such as industrial images, video materials, or office backups). This wastes a lot of work time.Through link aggregation settings, the bandwidth of the two Ethernet ports can be combined. For example, two 2.5GbE ports can be aggregated into 5Gbps bandwidth, and two Gigabit ports can be aggregated into 2Gbps bandwidth.This greatly improves the speed of internal network data transmission. To achieve link aggregation, your router and switch must also support this function, and the protocols must be consistent. Multi-Network Segment Access: Save Time and Effort If you need to access two different local area networks (such as the office intranet and the test environment), a single Ethernet port device requires frequent cable plugging and unplugging. This is time-consuming and inefficient.The two Ethernet ports can be connected to different network segments respectively. You don’t need to plug and unplug the network cable frequently. You can access two different local area networks at the same time.It saves time and improves work efficiency, especially for IT maintenance and industrial debugging personnel. Key Advantages of Dual Ethernet Port Mini PC Compared with single Ethernet port Mini PCs and traditional desktop computers, dual Ethernet port devices have obvious advantages. They are practical and easy to use, and can bring real value to users. High Security Physical network isolation avoids mutual access between internal and external networks. It effectively prevents unauthorized access and data leakage. It is suitable for enterprises, industrial sites, and other scenarios with high security requirements. High Stability Link backup function ensures uninterrupted network connection. Even if one network fails, the device can work normally. It reduces the impact of network failure on work and business. High Efficiency Bandwidth aggregation improves data transmission speed. Multi-network segment access saves the trouble of switching networks. It makes work and study more efficient. It also reduces the cost of purchasing multiple devices. Single vs Dual Ethernet Port Mini PC Task/Scenario Single Ethernet Port Mini PC Dual Ethernet Port Mini PC Network Isolation Not supported; high data leakage risk Physical isolation; safe and reliable Bandwidth Aggregation Not supported; slow transmission Supported; up to 20Gbps (10GbE×2) Multi-Network Access Need frequent cable plugging; inefficient Dual access; no cable switching Link Backup No backup; easy to go offline Automatic switch; uninterrupted Industrial/Professional Use Not suitable; cannot meet needs Ideal, stable, and functional Core Application Scenarios Dual Ethernet port Mini PCs are widely used. They can meet the needs of different scenarios. Industrial Automation Industrial production lines need to connect to internal equipment (PLC, frequency converter, sensor) for real-time control, and also connect to the cloud for data analysis. Single-port devices cannot separate these two networks, leading to unstable data transmission and potential risks.One Ethernet port connects to the PLC, frequency converter, sensor, and other industrial equipment. The other connects to the cloud or upper computer to upload data. It is used as an industrial gateway or edge computing device. Soft Router / Bypass Gateway Traditional routers have limited functions and poor flexibility. They cannot meet the needs of internet access control, ad blocking, and VPN services for enterprises and families.One Ethernet port is used as a WAN port to connect to the optical modem for dial-up internet access. The other is used as a LAN port to connect

Why You Need a Dual Ethernet Port Mini PC: 5 Game-Changing Scenarios (2026 Guide) Read More »

Single Channel vs Dual Channel RAM

Single Channel vs Dual Channel RAM: Which One Should You Choose in 2026?

Single Channel vs Dual Channel RAM: Which One Should You Choose in 2026? Announcements Buyer Guide Comprehensive Tips Occasion Product Review Q&A Tutorials The Big Question for PC Users When building or upgrading a PC, one common confusion is RAM configuration. Should you go for single-channel RAM or dual-channel RAM?Many people hear “dual channel is better” and rush to buy two memory sticks. But this is not always the case.This article will explain dual-channel RAM in simple terms. It will also show you when single-channel RAM has its own advantages. By the end, you’ll know which one fits your needs best. What Is Dual Channel RAM? First, let’s understand the basics. RAM (Random Access Memory) is your PC’s “short-term memory.” It stores data that your PC is using right now.Single-channel RAM uses one memory stick. Data travels along a single “path” to the CPU.Dual-channel RAM uses two identical memory sticks. It creates two parallel paths for data.Think of it like a highway. A single channel is a one-lane road. A dual channel is a two-lane road. More lanes mean faster data flow.Dual-channel RAM doubles the memory bandwidth. Bandwidth is the amount of data that can be transferred per second. This boost makes a real difference in many tasks.By 2026, DDR5 will have become the mainstream memory standard. It’s worth noting that a single DDR5 memory stick has two independent 32-bit sub-channels built in. This means even if you only insert one DDR5 stick, it is already running a certain form of “dual channel”. If you pursue extreme performance, filling both memory slots with DDR5 sticks to form a “quad-channel effect” (two 64-bit widths) is the standard configuration today. Key Benefits of Dual Channel RAM Dual channel RAM is not just a “marketing trick.” It offers clear advantages for most users. Here are the main ones: 1. Better Gaming Performance Gamers love dual-channel RAM. Games need fast data access to run smoothly.Dual channel reduces lag and stutters. It makes game frames more stable.For example, if you play AAA games like Cyberpunk 2077 or Elden Ring, dual-channel RAM will give you a smoother experience. This is one of the top dual-channel RAM benefits for gaming. 2. Faster Multitasking Do you open many tabs, edit documents, and run apps at the same time? Dual channel RAM handles this better.It can load multiple apps faster. It also prevents your PC from slowing down when switching between tasks. 3. Improved Integrated Graphics (iGPU) Performance If your PC uses integrated graphics (no separate GPU), dual-channel RAM is a game-changer.Integrated graphics share RAM with the CPU. More bandwidth means better graphics performance.Dual channel can boost iGPU performance by about 45% in AIDA64 Bandwidth Test. This is crucial for casual gaming or video editing on laptops without a dedicated GPU. The difference between single-rank and dual-rank memory also affects this performance, but dual-channel is still the key to unlocking iGPU potential. 4. Better for Productivity Tasks Tasks like video editing, 3D rendering, and programming need lots of data transfer.Dual-channel RAM speeds up these tasks. It cuts down on rendering time and makes editing software run more smoothly. This is why dual-channel RAM for video editing is highly recommended. When Is Single Channel RAM Better? Dual channel is great for most users. However, single-channel RAM has its own strengths in specific situations. Here are the times to choose a single channel: 1. Low-Power Devices (Energy Saving) Single-channel RAM uses less power than dual-channel, but the difference is usually only about 1-3 watts.For fanless mini PCs or embedded systems that you specialize in, this small power reduction is more meaningful for relieving thermal pressure than saving electricity itself. Less power consumption means less heat generation, which is crucial for the long-term stable operation of fanless devices that rely on passive heat dissipation.This is perfect for devices that need long battery life. Examples include laptops for office work, embedded systems, or 24/7 soft routers. For fanless mini PCs like Hystou that focus on stability, single-channel RAM means fewer failure points and lower heat generation. When used as a 24/7 firewall or edge computing gateway, stability is often more important than a little bandwidth gain.If you need a low-power PC, single-channel RAM is the better choice. It saves energy without sacrificing basic performance. 2. Better Compatibility and Stability Sometimes, two memory sticks can cause compatibility issues. This happens if they are from different brands, have different speeds, or have different memory chips.Single-channel RAM avoids this problem. One stick is simpler and more stable.This is also useful for old laptops or mini-PCs with faulty memory slots. If one slot is broken, the single-channel RAM will work perfectly. 3. Lower Latency for Specific Tasks It’s not absolute to say “single channel has lower latency” technically. Although dual channel has an extremely small overhead when synchronizing data, its “effective latency” is usually lower when handling a large number of concurrent requests due to its doubled bandwidth.In 2026, this point becomes more obvious with DDR5. Since a single DDR5 stick has built-in dual 32-bit sub-channels, its latency performance in single-channel mode is much better than that of DDR4 single-channel memory.For tasks that care more about latency than bandwidth (like soft routers, NAS, or virtual machine single-core pass-through), a single channel is still a better choice. You can test the latency difference through tools like AIDA64 Bandwidth Test, which is a professional way to verify memory performance.Latency is how long it takes for RAM to respond to the CPU. Single-channel RAM can sometimes have lower latency than dual-channel RAM.This is because dual-channel requires two sticks to sync. This sync can slightly increase latency.For tasks that care more about latency than bandwidth (like soft routers, NAS, or virtual machine single-core pass-through), a single channel is better. 4. Budget-Friendly Minimal Builds If you only use your PC for basic tasks, single-channel RAM is cheaper and sufficient.Basic tasks include web browsing, watching videos, typing documents, or using social media.In 2026, 16GB is the starting point for office use, and

Single Channel vs Dual Channel RAM: Which One Should You Choose in 2026? Read More »

HYSTOU mini pc

What Can a Mini PC Do? 11 Modern Applications & Buying Guide

What Can a Mini PC Do? 11 Modern Applications & Buying Guide Announcements Buyer Guide Comprehensive Tips Occasion Product Review Q&A Tutorials Mini PCs Are Not “Low-End Desktops” Many people’s first reaction to a Mini PC is: “Such a small machine—what can it do? The performance must be worse than traditional desktops.” This skepticism seems reasonable, but it overlooks a core point—performance is never the only metric for computing devices. In fact, Mini PCs were not designed to “replace desktops.” Their design philosophy is achieving optimal solutions for specific scenarios. Desktops pursue extreme performance, industrial Mini PCs pursue stability and reliability, while consumer Mini PCs pursue energy efficiency, space efficiency, silent operation, and plug-and-play simplicity. Mini PC vs Desktop: Not Replacement, But Complementarity Aspect Desktop Consumer Mini PC Industrial Mini PC Core Goal Extreme performance Energy efficiency & space Stability & reliability Typical Power 150-600W+ 15-65W 10-50W Size 15-30 liters Under 1 liter 1-3 liters Environment Standard office Home/office -40°C to 85°C wide temp Operation Time 8-hour workday 8-16 hours 24/7 continuous Best For Heavy gaming, 3D rendering HTPC, office, light gaming Industrial, medical, security So, what can a Mini PC do? Below, I’ll break down 11 major application scenarios from both consumer and industrial perspectives. Part 1: Consumer Mini PC Application Scenarios Consumer Mini PCs target individual and home users, pursuing cost-effectiveness, silent operation, and ease of use. Here are 5 typical scenarios: Scenario 1: Home Theater (HTPC) Mini PCs are ideal for building home theater systems. They can be installed in TV cabinets, connected to large-screen TVs via HDMI, and deliver 4K or even 8K Ultra HD video playback. Silent design: Fanless or low-noise fans, no disturbance during viewing Low power: Can stay on 24/7, instant on/off Hardware decoding: Supports HEVC/H.265, VP9, AV1 for 4K/8K Compact size: Hidden in TV cabinets, keeps the living room tidy Scenario 2: Office Workstation For daily office needs, Mini PCs offer excellent value. They handle documents, spreadsheets, and video conferencing smoothly while occupying minimal desk space. Space saving: VESA-mount behind monitors Lower energy: 1/5 of desktop power, saves ~75% electricity over 3 years Easy deployment: Plug-and-play, low IT management cost Multi-display: Easily connect 2-4 monitors Scenario 3: Software Router (Soft Router) Mini PCs are popular for building software routers. Compared to traditional routers, they offer more powerful network management with multi-WAN, traffic control, VPN, and ad blocking capabilities. Ultra-low power: Only 10-25W, runs 24/7 Powerful features: Compatible with iKuai, OpenWrt, pfSense Multi-purpose: Router, NAS, and download station combined Flexible expansion: Configure multiple ports for complex networks Scenario 4: Light Gaming While Mini PCs aren’t for hardcore AAA gamers, models with high-performance integrated graphics can smoothly run popular esports and light 3D games. Compact size: Perfect for living room entertainment Strong iGPU: AMD Radeon 780M comparable to GTX 1650 Lower power: ~65W during gaming Expandable: Some support external GPU enclosures Scenario 5: Home Server & NAS Mini PCs can transform into low-power home servers, serving as file storage, media library, download station, and home automation hub—more flexible than traditional NAS devices. Ultra-low power: Only 15-35W, low long-term operating cost Flexible software: TrueNAS, Unraid, Synology compatible Docker support: Run Plex, Jellyfin, Home Assistant, etc. Low noise: Suitable for bedroom or living room placement Part 2: Industrial Mini PC Application Scenarios Industrial Mini PCs feature wide temperature operation, vibration resistance, fanless design, and rich interfaces. They are widely used in harsh environments and professional fields. Here are 6 typical scenarios: Scenario 6: Industrial Control & Automation In factory automation, Mini PCs serve as industrial hosts for monitoring, control, and data acquisition. They replace traditional bulky industrial computers while providing stronger computing power. Wide temperature: Operates from -40°C to 85°C Vibration resistant: Designed for industrial vibration environments Fanless: Prevents dust ingress, ideal for dusty workshops Rich interfaces: RS232/485 serial ports, GPIO, LAN, etc. Scenario 7: Medical Equipment The medical industry has extremely high requirements for device stability and safety. Mini PCs are widely used in medical imaging terminals, EHR systems, and surgical room control equipment. Silent & fanless: Prevents cross-infection, suitable for ORs Stable & reliable: 24/7 continuous operation Easy to sanitize: Smooth surface, easy cleaning Low heat: Reduces thermal load in medical environments Scenario 8: Smart Manufacturing & Edge Computing In smart factories, Mini PCs serve as edge computing nodes for local data processing, AI inference, and machine vision. They deploy near production lines for low-latency response. Low latency: Local data processing, millisecond response Low power: Ideal for distributed deployment AI acceleration: Intel NPU or NVIDIA Jetson support Compact design: Install inside equipment or tight spaces Scenario 9: Transportation & Vehicle Systems In rail transit, maritime, and vehicle applications, Mini PCs serve as the core for control, monitoring, and entertainment systems. They must withstand vibration, humidity, and temperature fluctuations. Shock resistant: Passes ISO 16750 vibration testing Wide temp: Operates from -30°C to 70°C Flexible power: Supports 9-36V DC input Compact mounting: Embeds in consoles or cabinets Scenario 10: Security Surveillance Systems In security monitoring, Mini PCs serve as NVRs (Network Video Recorders) or video analytics servers, managing dozens of cameras and performing real-time AI analysis. Low power: 24/7 operation, lower electricity costs Multi-port: Direct connection to camera networks AI analytics: Face recognition, behavior analysis, etc. Stable: Ideal for unattended server rooms Scenario 11: Self-Service Kiosks & Digital Signage In retail, dining, banking, airports, and more, self-service kiosks and digital signage are everywhere. Mini PCs are the core control units for these devices. Compact size: Hidden inside terminals Stable operation: 24/7 continuous duty Remote management: Intel vPro, AMT support Multi-display: 4K dual-screen or video wall support Consumer vs Industrial: Mini PC Comparison Summary From the analysis above, we can see that consumer and industrial Mini PCs, while similar in size, differ significantly in design philosophy and application scenarios: Aspect Consumer Mini PC Industrial Mini PC Target Users Individuals, homes, small businesses Industrial enterprises, integrators, and government Environment Standard indoor (10-35°C) Harsh conditions (-40°C to 85°C) Operation Time 8-16 hours/day 24/7 continuous Cooling Fan-based primarily Fanless passive cooling Interfaces USB, HDMI, Ethernet,

What Can a Mini PC Do? 11 Modern Applications & Buying Guide Read More »

2026 Smart Home Hub Build Guide

2026 Smart Home Hub Build Guide: Create Your Home Smart Brain From 0 to 1

2026 Smart Home Hub Build Guide: Create Your Home Smart Brain From 0 to 1 Announcements Buyer Guide Comprehensive Tips Occasion Product Review Q&A Tutorials Have you ever faced these problems?Your Samsung lights can’t be controlled with Apple HomeKit.Cloud-based smart scenes often lag and stop working entirely when the internet goes out.Devices from different brands work in silos, with no way to create whole-home automation.The core solution to all these problems is building a standalone smart home hub.We’ll start with basic principles, and walk you through the full process — from hardware selection, system installation, to scene setup.We also include tested hardware recommendations and a pitfall checklist that 90% of beginners fall into, to help you get it right the first time. First Things First: What Is a Smart Home Hub? A smart home hub is the “brain” of all your connected home devices.It receives and processes signals from all your smart devices, runs the automation rules you set, and enables cross-brand device interoperability. Key Differences: Local Control vs Cloud Control Most off-the-shelf smart devices rely on brand cloud servers for control.This method has 3 critical flaws:- They stop working when your internet cuts out- Commands are routed through the cloud, causing frequent delays- Your home device data is stored on third-party servers, with privacy leak risksA local smart home hub runs all commands locally.It works reliably even without internet access, delivers millisecond-level response times, and protects your home’s privacy at the source. 3 Core Benefits of a Smart Home Hub – Break Brand Barriers: Unify control and automation for devices from Samsung, Apple, Google Nest, and more- Ultimate Stability & Reliability: Runs 24/7 locally, no internet downtime, zero command lag- Protect Home Privacy: All device data stays on-premises, no need to upload to third-party clouds Pre-Build Basics: Core Components & Protocols Explained Building a smart home hub doesn’t require complex technical knowledge.You only need to understand 3 core parts: hardware host, communication protocols, and hub software. How to Choose Hub Hardware? 3 Main Options Compared The first question most beginners ask: What device should I use as a hub?We’ve compared the pros and cons of 3 mainstream options to help you choose quickly: Hardware Host Core Advantages Core Disadvantages Best For Mini PC Low power consumption, high stability, full ports, strong expandability Slightly higher upfront cost than development boards All beginners, especially families seeking long-term reliability Raspberry Pi & Other SBCs Small form factor, low cost Weak performance, SD card corruption risk, prone to crashing during long-term operation Tinkerers, test scenarios with minimal devices NAS Network Storage Can double as file storage Limited performance allocation, risks of storage stability, and higher power consumption. Existing NAS owners who only want to test a smart hub lightly The conclusion is clear: A Mini PC is the best choice for beginners building a smart home hub. Mainstream Communication Protocols Explained Smart devices communicate with the hub via protocols. Beginners don’t need to memorize complex parameters, just the core differences:- WiFi: Highest penetration, no extra gateway needed, but can lag with many devices — ideal for large home appliances (e.g., Samsung smart refrigerators, LG smart washing machines)- Zigbee: Low power, low latency, strong anti-interference, the top choice for smart switches and sensors — requires a matching gateway (e.g., Amazon Echo Plus, Google Nest Hub)- Thread/Matter: New generation universal protocol, best cross-brand compatibility, the mainstream trend of the future, supported by Apple, Google, and Amazon- Bluetooth/BLE: Ideal for short-range devices like Schlage smart door locks and Ecobee temperature sensors, with limited coverage range Top Hub Software Recommendation for Beginners The most popular, beginner-friendly system in the world right now is Home Assistant.It’s 100% free and open source, supports over 10,000 smart devices and brands, has a visual interface, and is easy to use with no coding required.Most importantly, it natively supports local operation, perfectly matching the core needs of building a smart home hub. Golden Rules for Smart Home Hub Hardware Selection Choosing the right hardware makes 80% of your smart home hub build successful.For beginners, we’ve summarized 3 non-negotiable golden rules to help you avoid 90% of hardware pitfalls. Low Power Consumption Is Always the Top Priority A smart home hub needs to run 24/7, 365 days a year.Power consumption directly determines your long-term running cost.For example:- A 6W device costs ~$3.6 per year in electricity- A 15W device costs ~$9 per year in electricity- A device over 30W will cost over $18 per year in electricityOur recommendation: Prioritize devices with a TDP ≤10W, with the best value at around 6W. Stability Is a Non-Negotiable Bottom Line If your hub crashes, your entire smart home system goes down.That’s why stability is more important than raw performance.Prioritize these two types of devices:1. Fanless passive cooling design: No mechanical wear, zero noise, no risk of crashing from fan dust buildup2. Industrial-grade cooling design: Wide temperature operation, dust and interference resistance, ideal for long-term placement in enclosures or cornersIn addition, always choose devices that support auto power-on after an outage and a watchdog function. They will restart automatically after power is restored; no manual intervention is needed. You Must Reserve Room for Ports & Expandability The most common mistake beginners make: Only looking at performance, ignoring ports.As you add more smart devices to your home, you’ll need enough ports to expand functionality.Must-have port checklist:- At least 1 Gigabit Ethernet port (dual ports preferred, for network isolation and improved security)- At least 2 USB 3.0 ports (for connecting Zigbee/Bluetooth gateways, backup storage)- Wireless module supporting WiFi 6/Bluetooth 5.2 or higher (for new device compatibility and better coverage)- Upgradable RAM and storage slots (no need to replace the whole device when you add more devices later) Step-by-Step: Software Installation & Initial Setup Once you’ve chosen your hardware, we can start installing the hub system.We’ll use the most beginner-friendly Home Assistant OS as an example, no coding required, completed in 5 steps. 1. Prepare Installation Media Get a blank 8GB+ USB drive, download the official Rufus flashing tool,

2026 Smart Home Hub Build Guide: Create Your Home Smart Brain From 0 to 1 Read More »

Turn a Mini PC into a Home NAS

How to Turn a Mini PC into a Powerful Home NAS: 2026 Full Guide for Beginners & Advanced Users

How to Turn a Mini PC into a Powerful Home NAS: 2026 Full Guide for Beginners & Advanced Users Announcements Buyer Guide Comprehensive Tips Occasion Product Review Q&A Tutorials Have you ever faced these problems?You want a secure home storage solution for family photos, work documents, and 4K movies. But branded NAS devices like Synology or QNAP come with a high premium, even for entry-level 2-bay models.You have an unused mini PC sitting in a drawer, wasting away, with no idea that it can become a fully customizable, high-performance home NAS.You want to build a private cloud, media server, or smart home hub, but are put off by complex tutorials and high costs.This 2026 updated guide will take you from 0 to 1 with a mini PC NAS build.We break down the core advantages of a mini PC over a branded NAS, explain the hardware selection logic in depth, give you copy-paste step-by-step setup instructions, and share must-know pitfalls for beginners.We’ll also reveal the best mini PC for NAS in 2026, to help you avoid costly mistakes. Why Choose a Mini PC as Your NAS? Core Advantages Over Branded NAS First and foremost, let’s clear up a common question: Is a mini pc good for a NAS? The short answer is yes. For 95% of home users, a mini pc as a NAS is a better choice than a branded NAS. Here’s why. 1. Unbeatable Cost-Effectiveness, No Brand Premium Let’s do a direct comparison. An entry-level 2-bay branded NAS costs $250-$350, hard drives not included. It only offers basic functions, locked firmware, and limited expandability. A brand-new mini PC optimized for NAS costs $100-$200. It delivers better performance, full customization, and far more expansion options. If you use an old, unused mini PC? Your base cost is almost zero. You only need to add hard drives. 2. Unlimited Expandability, No Brand Restrictions Branded NAS locks you into fixed drive bays, limited RAM, and proprietary hardware. A mini pc for NAS has no such limits. You can upgrade RAM, add multiple SSDs/HDDs, upgrade network ports from 1Gbps to 2.5Gbps, and even add expansion cards for more storage. It grows with your needs, no need to buy a whole new device when your storage demands increase. 3. Full Functional Freedom, One Device for Multiple Uses A branded NAS is designed for one core job: storage. A mini pc as NAS can do so much more. With one device, you can run a file server, a Plex/Emby media server, a Home Assistant smart home hub, an AdGuard Home ad blocker, and even virtual machines. You don’t need multiple devices cluttering your home. One mini PC does it all. 4. Low Power & Silent Operation, Perfect for Home Use Most home users run their NAS 24/7. Power consumption and noise matter. Modern mini PCs for NAS use low-power processors, with a TDP of 6-15W. Full system idle power is only 10-20W. That means annual electricity costs as low as $15-$30, even for non-stop operation. In contrast, branded NAS with active fans and higher power draw can cost 2-3x more to run every year. 2026 Hardware Selection Criteria for a Mini PC NAS Many beginners make a critical mistake: they chase the highest CPU performance for their NAS. This is completely wrong. The core requirements for a home NAS are 24/7 stable operation, low power consumption, and silent running. High-performance CPUs bring unnecessary heat, noise, and electricity costs. Here are the exact criteria you need to follow to pick the best mini PC for a NAS. 1. CPU: Low Power & Stability First, Not Raw Performance For a home NAS, you don’t need an Intel Core i7 or AMD Ryzen 7 processor. The ideal choice is an Intel Celeron J/N series or Pentium Silver processor. These chips have a TDP of 6-15W, 4 cores/4 threads, and built-in integrated graphics for hardware video transcoding. They handle all core NAS tasks with ease, while keeping power and heat to a minimum. 2. RAM: Not More is Better, Enough With Headroom is Key NAS systems use RAM for file caching, service running, and multitasking. Minimum: 8GB DDR4/DDR5 (for basic file storage only) Recommended: 16GB (for most home users, with media services and plugins) Advanced: 32GB+ (for virtualization, multiple concurrent services)ECC RAM is a bonus for data integrity, but not required for most home users. 3. Storage Expansion: The Heart of Your NAS A good mini pc for NAS needs multiple, flexible storage interfaces.The golden setup for NAS is: A dedicated SSD for the operating system (128GB-256GB minimum) One or more large HDDs/SSDs for data storage An optional backup drive or cache drive. Look for a mini PC with M.2 NVMe, mSATA, and 2.5-inch SATA ports. These give you the most flexibility for your storage setup. 4. Network: The Upper Limit of Your File Transfer Speed Your network port determines how fast you can move files to and from your NAS. Minimum: 1x Gigabit Ethernet (1Gbps) port Recommended: 2x Gigabit or 2.5Gbps Ethernet portsDual ports support link aggregation, network redundancy, and internal/external network isolation. They eliminate bandwidth congestion when multiple devices access the NAS at the same time. 5. Cooling & Power: The Key to 24/7 Stable Operation For a 24/7 NAS, cooling and power reliability are non-negotiable. A fanless mini pc for NAS is always the best choice for home use. No fan means zero noise, no dust buildup, and no mechanical parts to fail. For power, look for a mini PC with stable DC power input, auto power-on after outage, and Wake on LAN (WOL) support. These are must-have features for a reliable NAS. 2026 Top Pick Mini PC for NAS: HYSTOU H3 Intel J5005 Fanless Industrial Mini PC Silent & Reliable Operation: Fanless full aluminum alloy chassis delivers 0dB noise during 24/7 running, eliminates fan failure and dust accumulation risks, and works stably in -20℃ to 50℃ extreme environments Ultra-Low Power Consumption: Equipped with a 10W TDP Intel Pentium Silver J5005 4-core processor, the annual electricity

How to Turn a Mini PC into a Powerful Home NAS: 2026 Full Guide for Beginners & Advanced Users Read More »

industrial mini pc exclusive functions

Industrial Mini PC Exclusive Functions: A Complete Guide 2026

Industrial Mini PC Exclusive Functions: A Complete Guide (2026) Announcements Buyer Guide Comprehensive Tips Occasion Product Review Q&A Tutorials Industrial mini PCs are the core equipment for industrial automation and edge computing. They are small in size and strong in stability. More importantly, they have many exclusive functions that ordinary home mini PCs do not have.These functions are designed specifically for industrial scenarios. They can solve pain points such as unattended operation, remote operation and maintenance, and operation in extreme environments. Below, we will detail the core exclusive functions of industrial mini PCs. 1. Wake on Lan (WOL) Function Wake on LAN is the most commonly used remote management function for industrial mini PCs. It supports wake-up in any shutdown mode and is enabled by default in BIOS.Simply put, you can send commands through the network. Then you can wake up the device in a deep shutdown state. No manual on-site operation is required.There is a key point to note here. Under the Windows system, you need to turn off fast startup to wake up successfully.This function is especially suitable for scattered industrial terminals. Such as outdoor monitoring nodes and edge computing devices. It can greatly reduce the on-site workload of operation and maintenance personnel. 2. Power on Self Starting Function In industrial settings, sudden power outages are common. The automatic power-on function can solve the pain point of not recovering automatically after a power outage.It has two opening methods, which are not enabled by default. The first is through BIOS configuration, which is flexible and convenient to operate. The second is to move the position of the PWRON1 jumper on the motherboard, which is more stable.Whether it is production line control or 24-hour monitoring equipment. Automatic power-on can ensure that the device resumes operation immediately after power is restored after a power outage. 3. Scheduled Boot Function (Wake system from s5) The scheduled boot function is suitable for industrial scenarios with regular operation. It can make the device start automatically at a preset time in a completely shut-down state.The opening method is very simple, just modify the BIOS. You can set it to start at a fixed time every day. You can also set it to start with a delay after shutdown.It should be noted that it also needs to turn off WindowsFast Startupp. At the same time, the device needs to be kept powered on to trigger normally. 4. UEFI PXE Network Boot Function For large-scale industrial terminal deployment, the network boot function is crucial. It supports UEFI PXE mode, with fast boot speed and strong compatibility.There is no need to install the system separately on each device. You can deploy in batches by obtaining the boot image through the local area network.To enable it, you only need to set network boot as the first boot item in BIOS. Then ensure that the device is connected to the local area network and PXE server. 5. Industrial Exclusive Expansion Functions In addition to the above boot and wake-up functions, industrial mini PCs also have many exclusive expansion functions. These functions are completely not available in ordinary home mini PCs. Serial Port Expansion Function In industrial scenarios, many peripherals rely on a serial port connection. Such as sensors, PLCs, and barcode scanners.Industrial mini PCs are equipped with native RS-232 and RS-485 serial ports. No additional adapter is needed, and it can be used directly by connecting.It supports long-distance transmission and has strong anti-interference ability. It is perfectly suitable for the deployment needs of large industrial workshops. Wide Temperature Adaptation Function Extreme environments, such as high and low temperatures,s often exist in industrial sites. Ordinary home mini PCs cannot adapt to such environments.Industrial mini PCs adopt industrial-grade wide-temperature components. Regular models support operation at -20℃~60℃, and high-end models can reach -40℃~85℃.Whether in high-temperature areas of workshops or cold outdoor environments. It can run stably without crashes or restarts. Hardware Watchdog Function Industrial equipment needs to run 24/7 uninterrupted. The watchdog function is the core line of defense to ensure stability.It requires the system to “feed the dog” periodically through a timer circuit. If the system freezes or the program runs away, it cannot “feed the dog”.The watchdog will automatically trigger a system reset to force recovery. It effectively reduces production interruption and data loss. Power Failure Protection Function Sudden power outages are likely to cause data loss and component damage. The power failure protection function of industrial mini PCs can effectively avoid such risks.It has a built-in super capacitor, which can provide a short-term power supply after a power failure. It is enough for the system to save data and shut down normally.At the same time, the software will monitor the power supply status in real time. Once a power outage is detected, it will immediately trigger the automatic save command. 6.Core Differences Between Industrial Mini PCs and Ordinary Home Mini PCs Many people will wonder why there is such a big functional gap between industrial mini PCs and ordinary home mini PCs.First, the positioning is different. Home mini PCs focus on office and entertainment, and cut unnecessary functions to reduce costs.Second, the hardware is different. Industrial mini PCs have independent wake-up, clock, and protection circuits. Home computers do not have these exclusive designs. Finally, the components are different. Industrial machines use industrial-grade components, which support long-term, uninterrupted operation. Home machines are consumer-grade and only suitable for intermittent use. Breaking Boundaries: Bringing Industrial-Grade Performance to Your Home and Office Industrial mini PCs are no longer confined to factory floors. Their “hardcore” features are becoming the secret weapon for tech enthusiasts, remote professionals, and smart-home geeks. Here is how these exclusive functions provide a “pro-level” upgrade to your daily digital life: 1. Seamless Remote Work & Energy Efficiency WOL (Wake-on-LAN) + Scheduled Boot: The Pain Point: Leaving a PC on 24/7 wastes electricity and wears out hardware, but turning it off means you can’t access files remotely. The Solution: Use your phone to remotely “wake up” your home workstation only when needed.

Industrial Mini PC Exclusive Functions: A Complete Guide 2026 Read More »

Enable LAN Wake (WOL) on Your Mini PC

How to Enable LAN Wake (WOL) on Your Mini PC: Complete Guide (2026)

How to Enable LAN Wake (WOL) on Your Mini PC: Complete Guide (2026) Announcements Buyer Guide Comprehensive Tips Occasion Product Review Q&A Tutorials Many people buy mini PCs for their small size, space-saving design, and low power consumption. They are often used as home NAS, lightweight office hosts, soft routers, or hanging devices placed in corners.However, there is a common trouble in daily use. When the device is turned off, you have to go and turn it on manually to access files or control programs remotely. This is time-consuming and troublesome.In fact, you can easily solve this pain point by mastering the small skill of “Wake-on-LAN (WOL)”. Without touching the mini PC at all, you can send a remote command with your phone, another computer, or even a router to make the shut-down or hibernating mini PC start automatically.Today, we will explain WOL in the simplest terms. You will learn what it is, how useful it is for mini PC users, and how to enable this feature step by step. Even beginners can easily follow along. What is Wake-on-LAN (WOL)? WOL, short for Wake-on-LAN, is simply defined as sending a special “wake-up command” through the local area network (LAN) to automatically start a mini PC that is shut down or in hibernation.You can think of it as installing a “remote wake-up switch” for your mini PC. Even when the mini PC is turned off, its network card remains in ultra-low power standby mode, like a sentry on duty at all times.Once it receives the correct “wake-up command” (called a “Magic Packet” in the industry), it will immediately trigger the boot process—no manual operation is needed at all.Important reminder: WOL does not require the mini PC to stay on standby all the time (which would consume electricity). As long as the device is plugged in and the network card supports this feature, remote wake-up is achievable.This perfectly aligns with the core advantages of mini PCs: low power consumption and energy savings. It is especially suitable for scenarios where the device is placed in a corner and nis ot easy to turn on manually frequently. Key Point: Why is WOL Useful for Mini PC Users? For the mainstream usage scenarios of mini PCs, WOL is not an “extra bonus” but a “necessary skill”. These 3 scenarios are the most practical—see if you can relate: Home NAS Scenario: Access Files Remotely Without Going to the Machine Room Many people use mini PCs to build lightweight NAS for storing photos, videos, and backup files. But you don’t have to keep the mini PC on 24/7 (even with low power consumption, the electricity bill will add up over a year).With WOL enabled, when you want to access files on the NAS while away from home, you can send a wake-up command with your phone. The mini PC will start automatically. After accessing the files, you can shut it down remotely again.This not only does not delay usage but also saves electricity. According to the 2026 mini PC power consumption data, the standby power consumption is only 8W. Turning it on on demand can save nearly 200 yuan in electricity bills a year compared to 24/7 standby. Office/Hanging Scenario: Remote Control, No Need to Run to the Site Use the mini PC as an office host, monitoring host, or to hang and run programs or PCDN. You don’t need to operate it frequently, but you may occasionally need remote maintenance or data retrieval.With WOL, whether you are in the company or at home, as long as you are on the same LAN (or connected via VPN), you can wake up the device. After completing the remote control, you can shut it down.This eliminates the need to go to the site to turn it on manually, greatly improving efficiency. It is especially suitable for small office scenarios or personal hanging needs. Soft Router/Industrial Control Scenario: Cluster Management, Flexible and Worry-Free Users who use mini PCs as soft routers or industrial controllers often need to manage multiple devices. With WOL enabled, you can send wake-up commands in batches through one device.There is no need to turn on each device manually one by one. It adapts to the remote management needs of complex network environments, and the low power consumption feature also reduces the overall operation and maintenance costs. Practical Tutorial: Enable WOL on Mini PC in 3 Steps Most mainstream mini PCs (such as ASUS NUC, MSI CubiNUC, Intel NUC, and various domestic mini hosts) support WOL. The core steps are “BIOS Settings + System Settings + Disable Fast Startup”.Each step is simple and easy to follow. The operational differences between different brands of mini PCs are small. You can refer to the official tutorials of the corresponding brands for adjustments. Step 1: BIOS Settings (Key Step to Enable Hardware Wake-Up Permission) BIOS is the “hardware control center” of the mini PC. You need to enable WOL-related permissions here first. The operation steps are as follows: After the mini PC is shut down, plug in the power. When starting up, press the “F2” or “Del” key continuously (slightly different for different brands, which will be prompted on the startup screen) to enter the BIOS settings interface. Press “F7” to enter Advanced Mode (some models are in Advanced Mode by default, so you can skip this step). Find the “Advanced” option, click to enter “APM Configuration” (Power Management Configuration); Find the “ErP” option and set it to “Disabled”. Then find the “Power On By PCI-E” or “Wake on LAN” option and set it to “Enabled”; Press “F10” to save the settings and restart. The BIOS settings are complete. Tip: If you cannot find the corresponding options, you can refer to the manual of your mini PC or visit the brand’s official website to check (such as ASUS and MSI both have detailed mini PC WOL setting tutorials).Some Intel NUC models need to enable the “Wake-on-LAN from S4/S5” option in the “Power” menu of the BIOS and set it

How to Enable LAN Wake (WOL) on Your Mini PC: Complete Guide (2026) Read More »

Shopping Cart
Scroll to Top

Important Notice on Fraud Prevention

Recently, scammers have been impersonating our company staff to commit payment fraud. To protect your interests, please pay attention to the following matters:

Verify Sender: Check if the email domain is @hystou.com. Immediately delete any emails from non-Hystou domains.

Double-Check: For any account modification requests, cross-verify via the customer service hotline listed on our official website hystou.com or through existing partnership channels.

Refuse Private Transactions: Do not trust claims like “urgent notifications,” “confidentiality requirements,” or “tax policy updates.” All business changes must follow official procedures.