
September 20, 2026

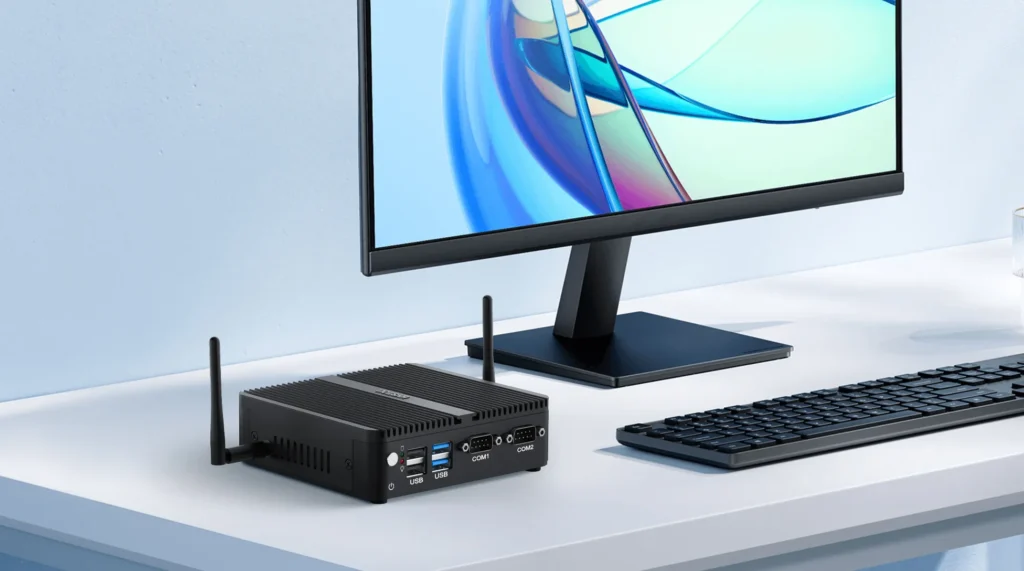
A black Hystou H3 industrial mini PC with dual Wi-Fi antennas, USB ports, and COM1/COM2 serial ports on a white desk, connected to a modern monitor and keyboard.

Industrial Mini PC: More Than Just Industrial

Industrial Mini PC: More Than Just Industrial The “industrial” label is a quality standard, not a limitation. Here is where these rugged machines shine in everyday life. Announcements Buyer Guide Comprehensive Tips Occasion Product Review Q&A Tutorials Picture an industrial mini PC. You probably imagine a factory floor. That picture is only half right. Today, industrial-grade mini PCs power digital signs, cash registers, and hospital displays. They also run home servers and network routers. The word “industrial” describes how these machines are built. It does not limit where they can be used. In fact, it is often a reason to choose one for everyday work. Industrial mini PC applications now span shops, clinics, classrooms, and living rooms. This guide explains what makes a mini PC industrial. It then shows six everyday places where these machines shine. You will also learn why ports like RS232 matter far beyond factories. What Makes a Mini PC “Industrial”? Industrial mini PCs are built to a higher standard. Four traits separate them from consumer models. Each one matters in daily use, too. 1. Fanless Cooling: Silent, Dust-Free, and Maintenance-Free Most consumer PCs rely on fans. Fans move air. They also move dust. And they wear out over time. A fanless industrial mini PC uses a solid aluminum chassis instead. It spreads heat through the metal body. There are no moving parts. As a result, noise drops to 0 dB. There is also nothing to clog or fail. This makes a fanless mini PC ideal for quiet rooms, dusty shops, and always-on setups. Fanless is not the only option, of course. HYSTOU also offers fan-cooled industrial mini PCs. The fan sits outside the chassis, on the aluminum heat sink. The case stays sealed, so dust cannot get in. Active cooling still supports higher-power processors, such as Core i5 and i7. These machines handle heavy workloads with ease. Choose fanless for silence and low maintenance. Choose air-cooled when performance comes first. 2. Wide Temperature Tolerance Consumer PCs usually work between 0°C and 40°C. Industrial mini PCs go much further. Many models run from -20°C to 70°C. Some stretch from -40°C to 85°C. That range sounds extreme for an office. However, the margin brings peace of mind. A device that survives a hot summer kiosk will never complain about a warm room. 3. 24/7 Operation and Self-Healing Features Industrial mini PCs are designed for always-on duty. They support auto power-on and wake-on-LAN. Many include a watchdog timer. The system can then restart itself after a crash. In practice, this reliability matters more than raw speed. A checkout system cannot afford downtime at noon. 4. Industrial Interfaces: RS232, Dual LAN, and GPIO Consumer mini PCs offer HDMI and USB. Industrial models add more. You get serial ports, often called RS232 or COM ports. You get dual Ethernet for stable networking. Some models add GPIO for sensors and relays. These ports look technical at first. For many users, however, they are exactly what makes the device useful. We will return to RS232 in detail. Six Everyday Places Industrial Mini PCs Shine Here is the key point. Industrial mini PCs are not limited to factories. They appear in surprising places every day. Consider these six. 1. Digital Signage and Information Displays Menu boards, mall screens, and airport displays run around the clock. That is demanding work for a computer. A fanless mini PC for digital signage is a natural fit. It plays content 24/7 without overheating. It has no fan to suck in dust from busy public spaces. Remote tools like wake-on-LAN make updates easy. For example, a restaurant menu board may run 16 hours a day. The right mini PC keeps it reliable for years. The demand is real. The global digital signage market was valued at USD 31.50 billion in 2025, according to Fortune Business Insights. It is projected to reach USD 69.90 billion by 2034. 2. Retail POS and Self-Service Kiosks This is where RS232 earns its keep. A point-of-sale system must talk to many peripherals. Cash drawers, receipt printers, and barcode scanners connect through serial ports. Self-checkout kiosks, vending machines, and ticket machines follow the same pattern. A native RS232 port does this job reliably. USB adapters can work, but they add failure points. A mini PC with RS232 ports simplifies the whole setup. Meanwhile, the fanless design keeps the checkout counter quiet. And 24/7 operation handles overnight updates and reporting. The trend is clear. The global self-service kiosk POS market was worth about USD 26.18 billion in 2026, according to Industry Research Co. It is expected to reach USD 64.92 billion by 2035. 3. Healthcare and Medical Equipment Hospitals are quiet by design. Fan noise is unwelcome in wards and clinics. Fanless industrial mini PCs fit right in. They power patient information displays, nurse station terminals, and medical carts. Many lab instruments still use serial connections. An industrial mini PC for healthcare can link them directly. Long product lifecycles also help here. Medical projects face long approval cycles. Stable hardware availability reduces compliance risk. 4. Office and Education An office desktop does not need to be loud. An industrial mini PC for office use offers silence, small size, and low power. It also lasts longer than a typical consumer box. That makes it a strong choice for offices, meeting rooms, and computer labs. Schools use these machines for digital classrooms and electronic bulletin boards. Access control and campus devices often rely on RS232 or RS485 links. One compact unit can handle several jobs at once. 5. Home Servers, Routers, and Media Stations Enthusiasts have discovered industrial mini PCs, too. A multi-LAN model makes an excellent home router or firewall. Many people run pfSense or OpenWrt on such hardware. Others use a mini PC for home server duties, like NAS storage. The same machine can run a Plex media station in the living room. Fanless design keeps it silent. Low power keeps the bill small. In fact, network engineers still use RS232 as a console port for routers

Industrial Mini PC: More Than Just Industrial Read More »
Classic Windows 7 logo featuring four colored wavy window panes (red, green, blue, yellow) with the text "Windows 7" below on a dark black background.

Windows 7 Installation Guide – Complete Step-by-Step Tutorial for Mini PCs

Windows 7 Installation Guide – Complete Step-by-Step Tutorial for Mini PCs Announcements Buyer Guide Comprehensive Tips Occasion Product Review Q&A Tutorials Table of Contents Before You Begin – What You Need to Know Preparation – Download ISO & Tools Step 1: Create a Bootable USB Drive with Rufus Step 2: Boot from USB and Enter Setup Step 3: Install Windows 7 Following the Wizard Step 4: Install Device Drivers Step 5: Activate Windows 7 Frequently Asked Questions (FAQ) Before You Begin – What You Need to Know Prerequisites Item Details Operating System Windows 7 Professional (SP1 recommended) USB Flash Drive 1 × USB drive, 8 GB or larger (USB 3.0 recommended for faster write speeds) Internet-Connected PC 1 × working computer (Windows or macOS) to download files Required Software Windows 7 ISO image (~2.4–3 GB) + Rufus (free, open-source) Estimated Time 20–30 minutes (excluding download time) Target Device HYSTOU mini PC with BIOS/UEFI support for Legacy boot Important Warnings Before You Start Data Loss: A clean installation will erase all data on the target drive. Back up any important files before proceeding. Hardware Compatibility: Confirm with HYSTOU support that your specific mini PC model supports Windows 7. Some newer platforms may require Windows 10/11. Power Stability: Ensure the mini PC is connected to a stable power source. Do not interrupt the installation process. Preparation – Download the Windows 7 ISO and Rufus Step 2.1: Download the Windows 7 ISO Image Open your browser and navigate to the official Microsoft digital distribution page for Windows 7 ISOs: 👉 https://massgrave.dev/windows_7_links Locate the Windows 7 Professional with SP1 section and click the download link. Select your preferred edition (Professional), language (English), and architecture (32-bit or 64-bit). Recommendation: For most HYSTOU mini PCs, use en_windows_7_professional_with_sp1_x64 (64-bit) for optimal performance. Wait for the download to complete (~2.4–3 GB). Step 2.2: Download Rufus (Bootable USB Creator) Visit the official Rufus website:👉 https://rufus.ie/en Click the Download button at the top of the page to get the latest version (e.g., rufus-4.x.exe). No installation is required — Rufus is a portable application. Simply double-click the .exe file to launch it. Step 1: Create a Bootable USB Drive Using Rufus Warning: This process will format your USB drive and erase all data on it. Make sure no important files are stored on the drive before continuing. 1.1 Select Your USB Drive and ISO File Insert the USB flash drive into your working computer’s USB port. Open Rufus. In the “Device” dropdown menu, select your USB flash drive. Verify the selection by checking the drive letter and capacity. Click “Select” next to “Boot selection” and browse to your downloaded Windows 7 ISO file. Rufus will automatically detect the image and display the edition name (e.g., en_Windows_7_Professional). Leave the Partition scheme as MBR and Target system as BIOS (or UEFI-CSM) . All other settings should remain at their defaults. 1.2 Confirm and Wait for Completion A warning dialog will appear informing you that all data on the USB drive will be destroyed. Click “OK” to confirm. Watch the progress bar at the bottom of the Rufus window. It will change from orange to green when the process is complete, and the status will read “READY”. Once complete, safely eject the USB drive using the system tray icon (“Safely Remove Hardware”). After creating the bootable USB, you may notice the drive appears to have less available space than before. This is normal — the ISO image has been written to the drive. To restore the USB drive for regular storage use, reformat it through Disk Management. Step 2: Boot from USB and Enter the Windows 7 Setup 2.1 Access the Boot Menu on Your Mini PC Insert the bootable USB drive into your HYSTOU mini PC.💡 Tip: Use a rear USB port for better compatibility during boot. Press the power button to turn on the mini PC. Immediately and repeatedly press the F11 or F7 key on your keyboard (tap rapidly — do not hold the key down). The exact key depends on your BIOS manufacturer: AMI BIOS: F7 Phoenix/Award BIOS: F11 HYSTOU default: F11 The Boot Menu will appear on screen. Stop pressing the key. If the system boots directly into the desktop or displays a black screen, restart and try again more quickly. 2.2 Select the USB Drive from the Boot Menu Use the arrow keys to navigate to your USB drive in the boot menu. It may appear as: AI Mass Storage USB: [Brand Name] Removable Device Press Enter to select it. The system will begin loading from the USB drive. You will see the “Starting Windows” loading screen, followed by the Windows Setup blue screen. This confirms a successful USB boot. Step 3: Install Windows 7 – Follow the Setup Wizard 3.1 Language and Regional Settings On the Windows Setup welcome screen, verify the following settings: Language to install: English Time and currency format: English (United States) Keyboard or input method: US Click “Next”. Click “Install now” on the next screen. 3.2 License Agreement Read the Microsoft Software License Terms. Check the box “I accept the license terms”. Click “Next”. 3.3 Choose Installation Type When prompted with “Which type of installation do you want?”, select:Custom (advanced)This performs a clean installation and gives you full control over disk partitioning. 3.4 Disk Partitioning (Critical Step) 1. You will see a list of drives and existing partitions.2. To start fresh: Select each existing partition on the target drive and click “Delete” until the entire disk shows as:Drive 0 Unallocated Space⚠️ Warning: Deleting partitions permanently erases all data on the drive. Double-check that you are selecting the correct disk, especially if your mini PC has multiple drives. 3. Select “Drive 0 Unallocated Space” and click “New”. Keep the default size (uses the entire disk) and click “Apply”. 4. Windows will automatically create a System Reserved partition and a Primary partition. Click “OK” on any confirmation dialogs. 5. Select the newly created Primary partition and click “Next”. 3.5 Wait for Installation to Complete

Windows 7 Installation Guide – Complete Step-by-Step Tutorial for Mini PCs Read More »

Shopping Cart
Scroll to Top

Important Notice on Fraud Prevention

Recently, scammers have been impersonating our company staff to commit payment fraud. To protect your interests, please pay attention to the following matters:

Verify Sender: Check if the email domain is @hystou.com. Immediately delete any emails from non-Hystou domains.

Double-Check: For any account modification requests, cross-verify via the customer service hotline listed on our official website hystou.com or through existing partnership channels.

Refuse Private Transactions: Do not trust claims like “urgent notifications,” “confidentiality requirements,” or “tax policy updates.” All business changes must follow official procedures.