Windows 7 Installation Guide – Complete Step-by-Step Tutorial for Mini PCs
- Before You Begin – What You Need to Know
- Preparation – Download ISO & Tools
- Step 1: Create a Bootable USB Drive with Rufus
- Step 2: Boot from USB and Enter Setup
- Step 3: Install Windows 7 Following the Wizard
- Step 4: Install Device Drivers
- Step 5: Activate Windows 7
- Frequently Asked Questions (FAQ)
Before You Begin – What You Need to Know
Prerequisites
| Item | Details |
|---|---|
| Operating System | Windows 7 Professional (SP1 recommended) |
| USB Flash Drive | 1 × USB drive, 8 GB or larger (USB 3.0 recommended for faster write speeds) |
| Internet-Connected PC | 1 × working computer (Windows or macOS) to download files |
| Required Software | Windows 7 ISO image (~2.4–3 GB) + Rufus (free, open-source) |
| Estimated Time | 20–30 minutes (excluding download time) |
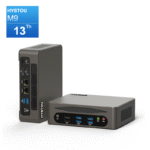
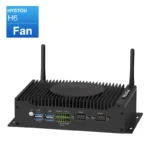
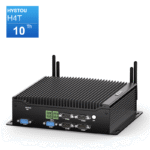
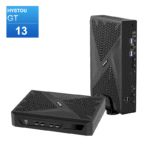
| Target Device | HYSTOU mini PC with BIOS/UEFI support for Legacy boot |
Important Warnings Before You Start
- Data Loss: A clean installation will erase all data on the target drive. Back up any important files before proceeding.
- Hardware Compatibility: Confirm with HYSTOU support that your specific mini PC model supports Windows 7. Some newer platforms may require Windows 10/11.
- Power Stability: Ensure the mini PC is connected to a stable power source. Do not interrupt the installation process.
Preparation – Download the Windows 7 ISO and Rufus
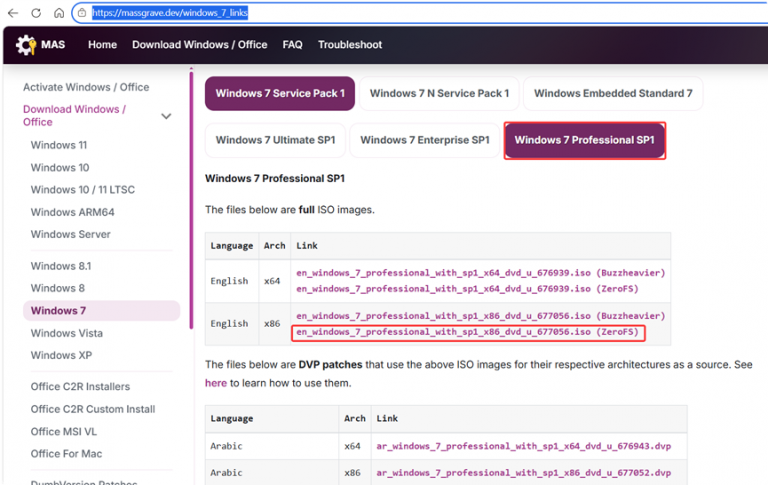
Step 2.1: Download the Windows 7 ISO Image
Open your browser and navigate to the official Microsoft digital distribution page for Windows 7 ISOs:
- Locate the Windows 7 Professional with SP1 section and click the download link.
- Select your preferred edition (Professional), language (English), and architecture (32-bit or 64-bit).Recommendation: For most HYSTOU mini PCs, use en_windows_7_professional_with_sp1_x64 (64-bit) for optimal performance.
- Wait for the download to complete (~2.4–3 GB).
Step 2.2: Download Rufus (Bootable USB Creator)
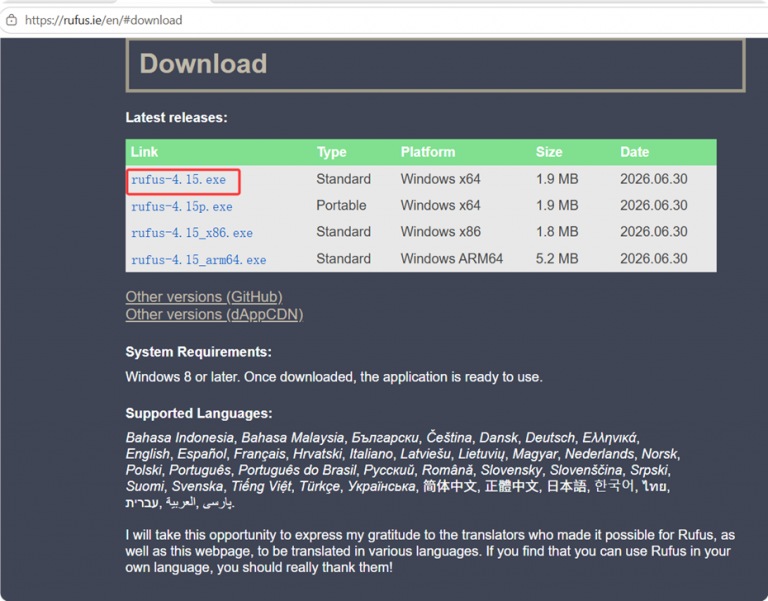
- Visit the official Rufus website:
👉 https://rufus.ie/en - Click the Download button at the top of the page to get the latest version (e.g.,
rufus-4.x.exe). - No installation is required — Rufus is a portable application. Simply double-click the
.exefile to launch it.
Step 1: Create a Bootable USB Drive Using Rufus
Warning: This process will format your USB drive and erase all data on it. Make sure no important files are stored on the drive before continuing.
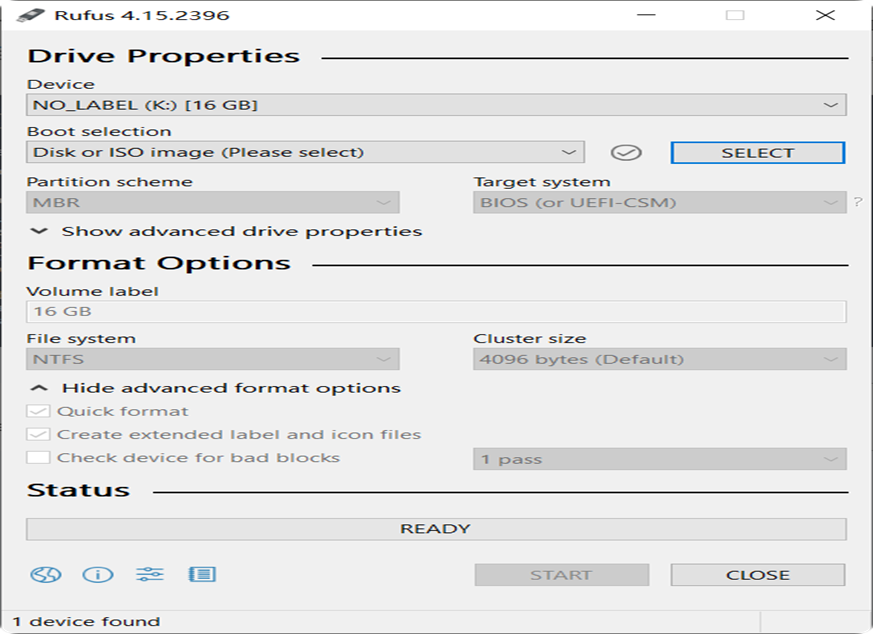
1.1 Select Your USB Drive and ISO File
- Insert the USB flash drive into your working computer’s USB port.
- Open Rufus.
- In the “Device” dropdown menu, select your USB flash drive. Verify the selection by checking the drive letter and capacity.
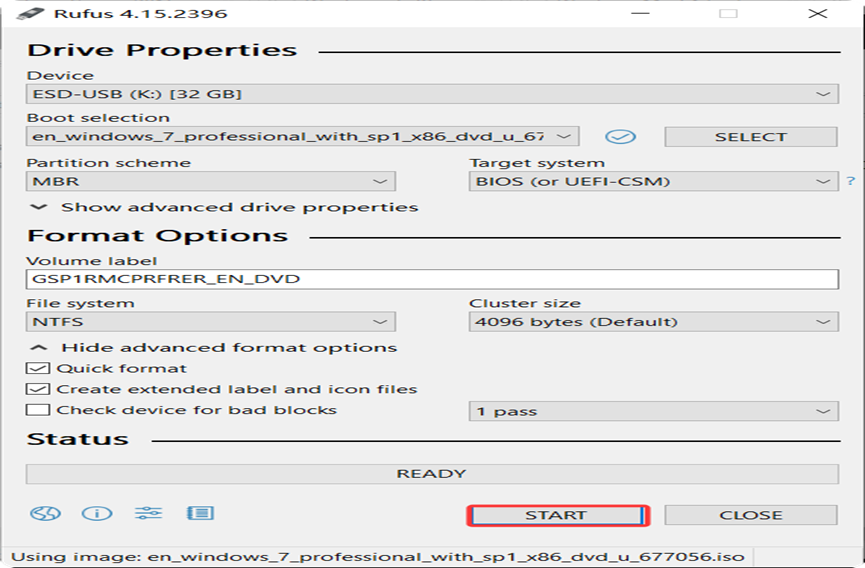
- Click “Select” next to “Boot selection” and browse to your downloaded Windows 7 ISO file. Rufus will automatically detect the image and display the edition name (e.g., en_Windows_7_Professional).
- Leave the Partition scheme as MBR and Target system as BIOS (or UEFI-CSM) . All other settings should remain at their defaults.
1.2 Confirm and Wait for Completion
- A warning dialog will appear informing you that all data on the USB drive will be destroyed. Click “OK” to confirm.
- Watch the progress bar at the bottom of the Rufus window. It will change from orange to green when the process is complete, and the status will read “READY”.
- Once complete, safely eject the USB drive using the system tray icon (“Safely Remove Hardware”).
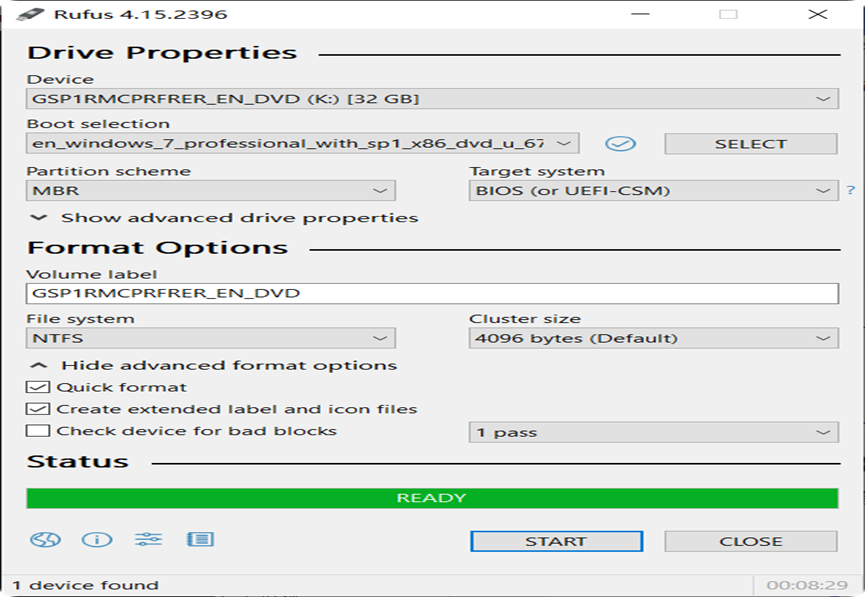
After creating the bootable USB, you may notice the drive appears to have less available space than before. This is normal — the ISO image has been written to the drive. To restore the USB drive for regular storage use, reformat it through Disk Management.
Step 2: Boot from USB and Enter the Windows 7 Setup
2.1 Access the Boot Menu on Your Mini PC
- Insert the bootable USB drive into your HYSTOU mini PC.💡 Tip: Use a rear USB port for better compatibility during boot.
- Press the power button to turn on the mini PC.
- Immediately and repeatedly press the F11 or F7 key on your keyboard (tap rapidly — do not hold the key down). The exact key depends on your BIOS manufacturer:
- AMI BIOS: F7
- Phoenix/Award BIOS: F11
- HYSTOU default: F11
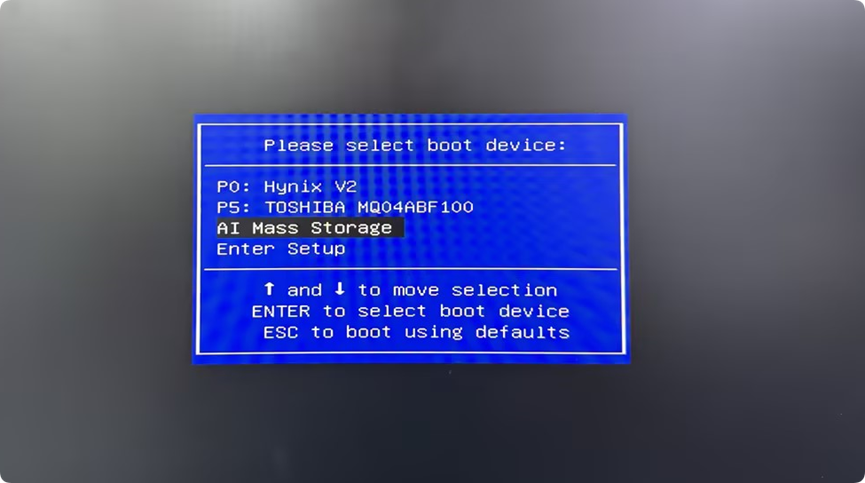
- The Boot Menu will appear on screen. Stop pressing the key.
If the system boots directly into the desktop or displays a black screen, restart and try again more quickly.
2.2 Select the USB Drive from the Boot Menu
- Use the arrow keys to navigate to your USB drive in the boot menu. It may appear as:
AI Mass StorageUSB: [Brand Name]Removable Device
- Press Enter to select it. The system will begin loading from the USB drive.
- You will see the “Starting Windows” loading screen, followed by the Windows Setup blue screen. This confirms a successful USB boot.
Step 3: Install Windows 7 – Follow the Setup Wizard
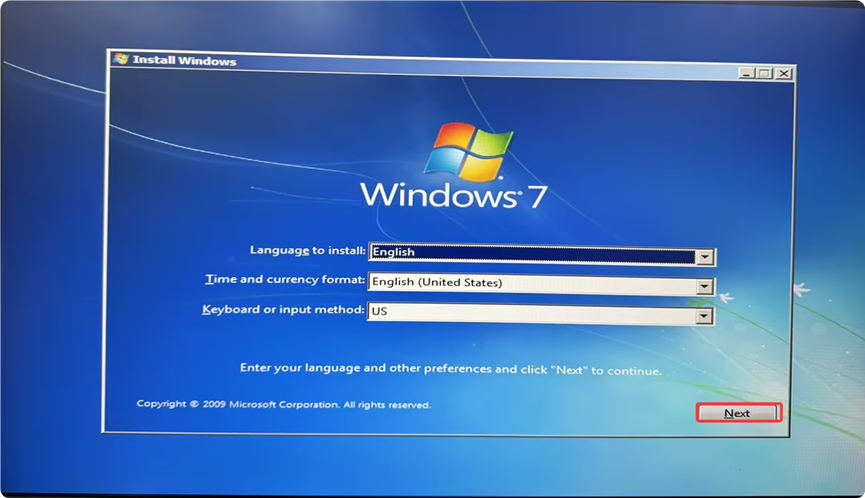
3.1 Language and Regional Settings
- On the Windows Setup welcome screen, verify the following settings:
- Language to install: English
- Time and currency format: English (United States)
- Keyboard or input method: US
- Click “Next”.
- Click “Install now” on the next screen.
3.2 License Agreement
- Read the Microsoft Software License Terms.
- Check the box “I accept the license terms”.
- Click “Next”.
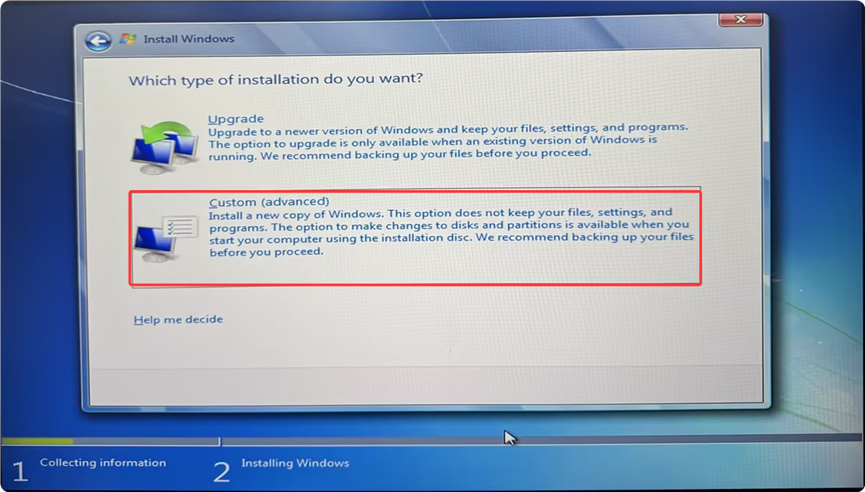
3.3 Choose Installation Type
Custom (advanced)
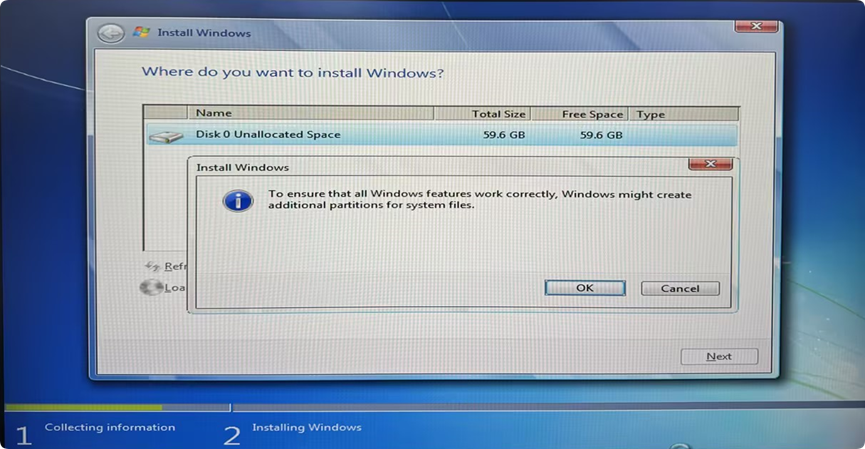
3.4 Disk Partitioning (Critical Step)
Drive 0 Unallocated Space
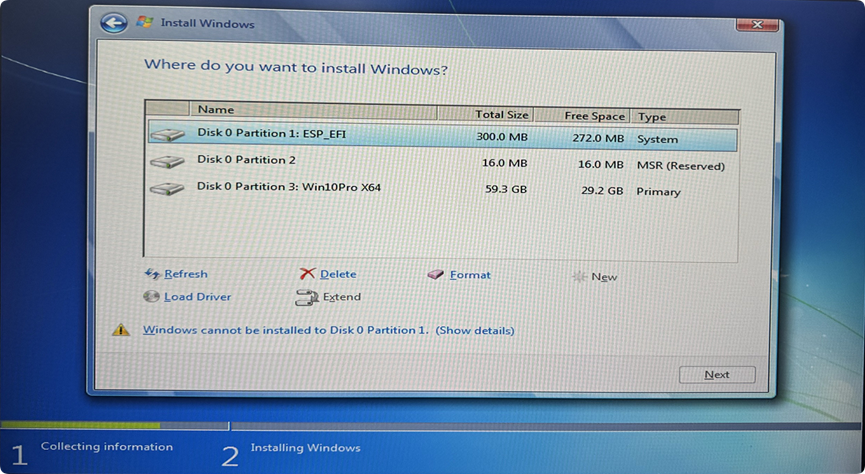
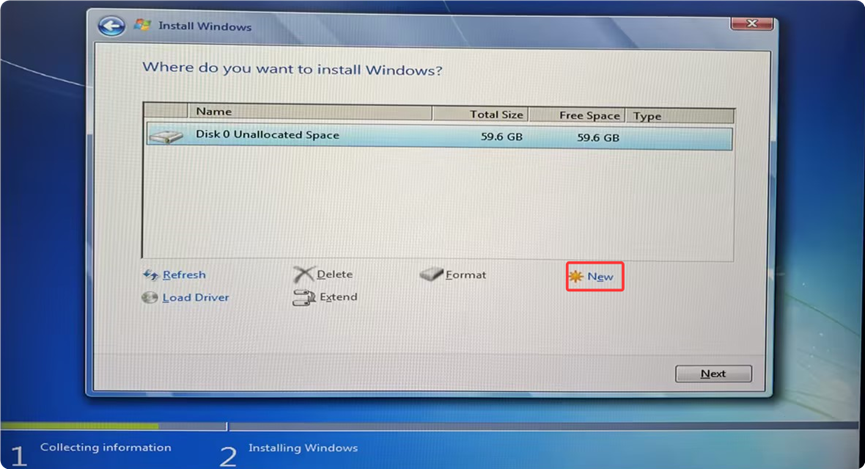
4. Windows will automatically create a System Reserved partition and a Primary partition. Click “OK” on any confirmation dialogs.
3.5 Wait for Installation to Complete
- Windows will now copy files, expand them, install features and updates, and complete the installation. This process takes approximately 10–20 minutes.
- The computer will restart multiple times during installation. This is normal — do not turn off the power.
- After installation completes, the Out-of-Box Experience (OOBE) setup wizard will appear:a. Set a username:
Enter your desired username and click “Next”.b. Set a password (optional):
Enter a password and password hint, or leave both fields blank to skip. Click “Next”.💡 Security Tip: If you set a password, store it in a safe place.
c. Enter product key:
Type your Windows 7 product key, or click “Skip” to enter it later.
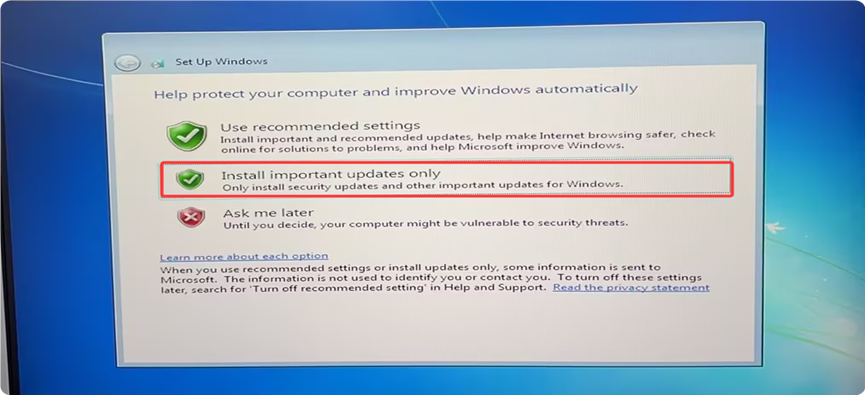
d. Choose update settings:
Select “Install important updates only” (recommended for initial setup).
e. Verify date and time:
Confirm the time zone, date, and time are correct, then click “Next”. - Windows 7 will finalize the configuration and display the desktop.
Step 4: Install Device Drivers
Proper drivers are essential for your HYSTOU mini PC to function correctly — especially network, graphics, and chipset drivers.
4.1 Check Device Manager for Missing Drivers
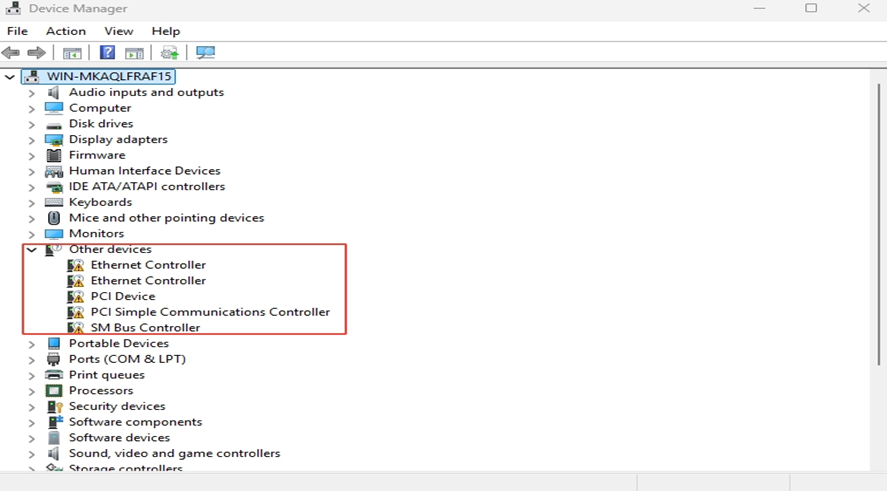
- Click Start → type Device Manager in the search box and press Enter.
- Look for devices marked with a yellow exclamation mark (⚠️) or listed under “Other devices” as “Unknown device.” Common missing drivers after a fresh Windows 7 install include:
- Network adapter (Ethernet / Wi-Fi)
- Graphics adapter (GPU / Display)
- Chipset / SATA controller
- Audio device
4.2 Install Drivers for Your HYSTOU Mini PC
- Obtain drivers from HYSTOU:
- Contact HYSTOU customer support and request the driver package for your specific mini PC model.
- HYSTOU provides a dedicated driver download package or direct download link for each product.
- Install the drivers:
- Extract the driver package (if compressed).
- Run the installer (
.exefile) and follow the on-screen prompts. - Restart the mini PC after installation if prompted.
💡 Priority Order: Always install the network adapter driver first. Without network connectivity, you cannot download additional drivers or system updates. If you cannot get online after installing all drivers, recheck the network driver installation.
Step 5: Activate Windows 7
Windows 7 must be activated to receive full functionality and security updates.
5.1 Online Activation
- Ensure your mini PC is connected to the internet.
- Click Start → type “Activate Windows” in the search bar and click “Activate Windows”.
- Click “Activate Windows online now”.
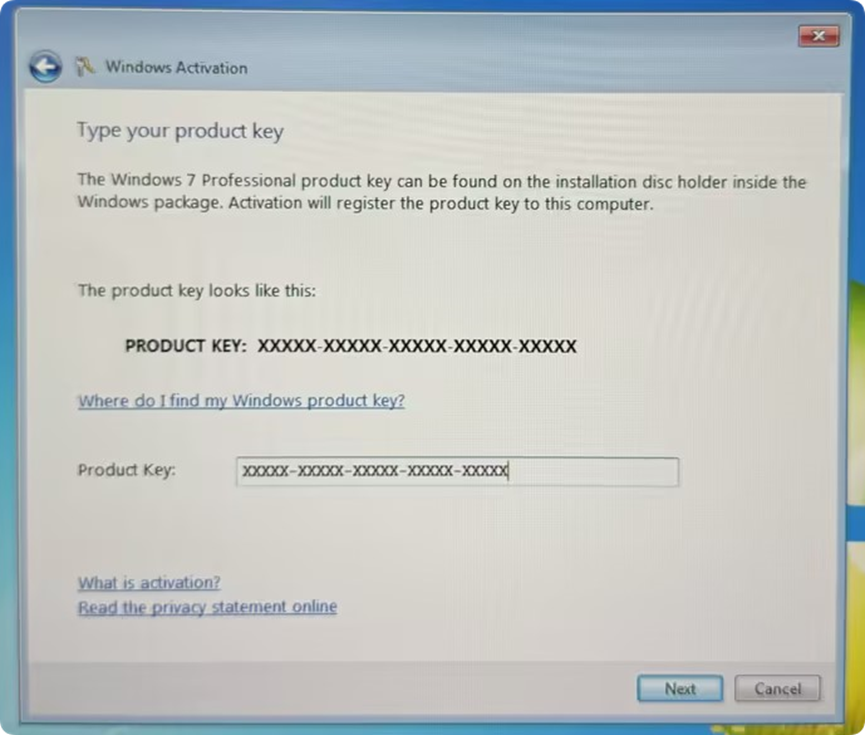
- If prompted, enter your 25-character product key and click “Next”.
- Wait for the confirmation message:
“Windows is activated successfully.”
- Restart the mini PC to complete the activation process.
Frequently Asked Questions
Can I install Windows 7 on any HYSTOU mini PC?
Most HYSTOU fanless mini PCs and industrial computers support Windows 7 Professional. However, newer models with 12th Gen Intel processors or later may not have official Windows 7 driver support. Always check with HYSTOU support before purchasing to confirm compatibility with your specific model.
Will installing Windows 7 erase all my data?
Yes. A clean installation of Windows 7 deletes all partitions and data on the target drive. Always back up important files before starting the installation.
What if I can't access the Boot Menu?
- Try F11, F7, F12, Esc, or Del immediately after powering on.
- Tap the key rapidly and repeatedly — do not hold it down.
- If the mini PC boots directly to the desktop, restart and try again.
Do I need a product key to install Windows 7?
You can install Windows 7 without a product key by clicking “Skip” during setup. However, you will need a valid product key to activate Windows and access all features.
Why can't I connect to the internet after installation?
The most common cause is a missing network adapter driver. Install the network driver first (provided by HYSTOU), then restart and check your connection. If problems persist, verify the driver matches your exact mini PC model.

Author: Nick FU
Marketing Specialist | HYSTOU Mini PC & Network Appliance Manufacturer
HYSTOU has established its R&D headquarters in Shenzhen, drawing on over a decade of experience. Our core team members, who previously served at renowned companies such as Inventec and Quanta Computer, form the backbone of our technical expertise. With robust R&D and innovation capabilities, we remain steadfast in our commitment to pursuing excellence in the field of technology products.