PXE Remote Maintenance: Complete Network Boot Guide
What Is PXE?
Core Components of PXE
- DHCP Server: Assigns IP addresses to clients and tells them where to find the boot server
- TFTP Server: A lightweight file transfer protocol for sending small boot files
- Boot Files: Special files that load the maintenance system kernel and environment
Common Problems & Deep Troubleshooting Guide
While PXE is powerful, it has specific requirements that often cause failures. Below are the most common issues with technical solutions and measurable troubleshooting steps.
1. Critical DHCP Configuration Errors
This is the #1 cause of PXE boot failures. PXE requires specific DHCP options that most default DHCP servers do not enable.
Critical Note: If your network uses VLANs or multiple subnets, PXE broadcasts will not cross routers by default. You must configure DHCP Relay (IP Helper) on your layer 3 switches to forward PXE requests to your PXE server.
2. Network Connectivity Issues
- Ensure client and server are on the same subnet (or DHCP Relay is properly configured)
- Use Gigabit Ethernet (10/100Mbps works, but is much slower)
- Test network connectivity with
ping -t 192.168.1.100from another machine - Check for duplicate IP addresses on the network
3. Legacy vs UEFI Boot File Mismatch
This is a very common mistake. Modern computers use UEFI instead of the old Legacy BIOS, and they require completely different boot files. Using the wrong file will cause PXE boot to fail silently.
4. Firewall Blocking TFTP Traffic
TFTP uses UDP port 69. Most operating system firewalls block this port by default. You must explicitly allow TFTP traffic on your PXE server.
How to Check If Your Computer Supports PXE
Before setting up PXE, confirm that your target computers support network boot. Here are the accurate methods for Windows and Linux systems.
Check via BIOS/UEFI
- Restart your computer
- Press the boot menu key during startup (usually F2, F10, F12, or Del)
- Look for options labeled:
- Network Boot
- PXE Boot
- LAN Boot
- IPv4 PXE / IPv6 PXE
Check via Device Manager (Windows)
- Right-click the Start menu and select Device Manager
- Expand the Network adapters section
- Right-click your Ethernet adapter and select Properties
- Go to the Advanced tab
- Look for properties related to:
- Wake-on-LAN
- Network Boot
- PXE Support
Check via Terminal (Linux)
- Open a terminal window
- First, identify your network interface name:bash
ip link show - Then use
ethtoolto check for PXE support (replaceeth0with your interface name):bashsudo ethtool eth0 - Look for the “Wake-on” line. If it shows
g(Wake on MagicPacket) Or mentions PXE, your card supports network boot.
Step-by-Step PXE Remote Maintenance Setup
This guide uses the most popular and easiest tools for PXE server setup. We recommend Tiny PXE Server for Windows or dnsmasq for Linux, as they combine DHCP and TFTP in a single package.
Step 1: Prepare the Server Environment
- Assign a static IP to your server (e.g., 192.168.1.100)
- Disable any other DHCP servers on the same network (conflicts will cause failures)
- Download and install your chosen PXE server software
- Configure the DHCP server with the critical options from the table above
Step 2: Place Correct Boot Files & Maintenance Images
| Client Boot Mode | Required Boot File |
|---|---|
| Legacy BIOS (old computers) | pxelinux.0 |
| Modern UEFI (64-bit) | bootx64.efi or ipxe.efi |
| UEFI (32-bit, rare) | bootia32.efi |
- Place the appropriate boot file in the root directory of your TFTP server
- Download a maintenance system image (WinPE for Windows, Clonezilla for disk cloning, or a Linux rescue image)
- Extract the entire contents of the ISO image to a subdirectory in your TFTP root
- Update your PXE configuration file to point to the correct kernel and initrd files
Step 3: Configure Client BIOS/UEFI Boot Priority
- Restart the target computer you want to maintain
- Press the BIOS/UEFI key during startup (F2, F10, F12, or Del)
- Navigate to Advanced > Network Stack
- Set PXE Boot or Network Boot to Enabled
- Go to the Boot menu
- Set Network Boot (LAN) as the First Boot Priority
- Save changes and exit BIOS/UEFI
Step 4: Boot Into Maintenance System & Perform Operations
- The client computer will now automatically start the PXE boot process
- It will send a DHCP broadcast request
- Your PXE server will respond with an IP address, TFTP server address, and boot file name
- The client will download the boot file from the TFTP server
- The boot file will load the maintenance system kernel and environment
- Once booted, you can perform any maintenance tasks:
- Reinstall the operating system
- Clone or backup hard drives
- Repair corrupted system files
- Scan for viruses and malware
- Reset forgotten passwords
What If Your Computer Doesn't Support PXE?
Many consumer laptops and some modern ultrabooks have PXE disabled by default or removed entirely. Here are the solutions:
- USB PXE Boot: Create a special USB drive that loads the PXE client from USB, then continues the boot process over the network. This works on almost any computer with USB boot support.
- External Network Card: Use a USB-to-Ethernet adapter or PCIe network card that explicitly supports PXE boot.
- BIOS Modification: Some motherboards allow enabling PXE through modified BIOS files. This is advanced and carries a risk of bricking your device.
Pro Tips for Reliable PXE Remote Maintenance
- Test on a single machine first: Always test your PXE setup on one computer before deploying to hundreds of devices.
- Use separate VLANs for PXE: Isolate PXE traffic on its own VLAN to prevent interference with normal network operations.
- Keep boot files updated: Regularly update your maintenance images with the latest drivers and security patches.
- Monitor server performance: PXE can be network-intensive during large-scale deployments. Ensure your server has sufficient bandwidth.
- Document everything: Keep detailed records of your PXE configuration, boot files, and troubleshooting steps for future reference.
Conclusion

HYSTOU
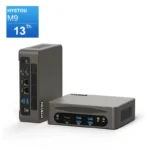
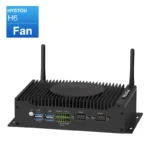
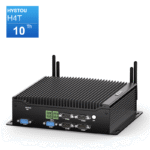
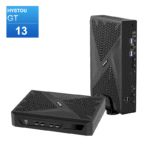
HYSTOU has established its R&D headquarters in Shenzhen, drawing on over a decade of experience. Our core team members, who previously served at renowned companies such as Inventec and Quanta Computer, form the backbone of our technical expertise. With robust R&D and innovation capabilities, we remain steadfast in our commitment to pursuing excellence in the field of technology products.