How to Build a RAID 1 Mirrored Array with Intel VMD on a Mini PC
What Is Intel VMD and Why Does It Matter?
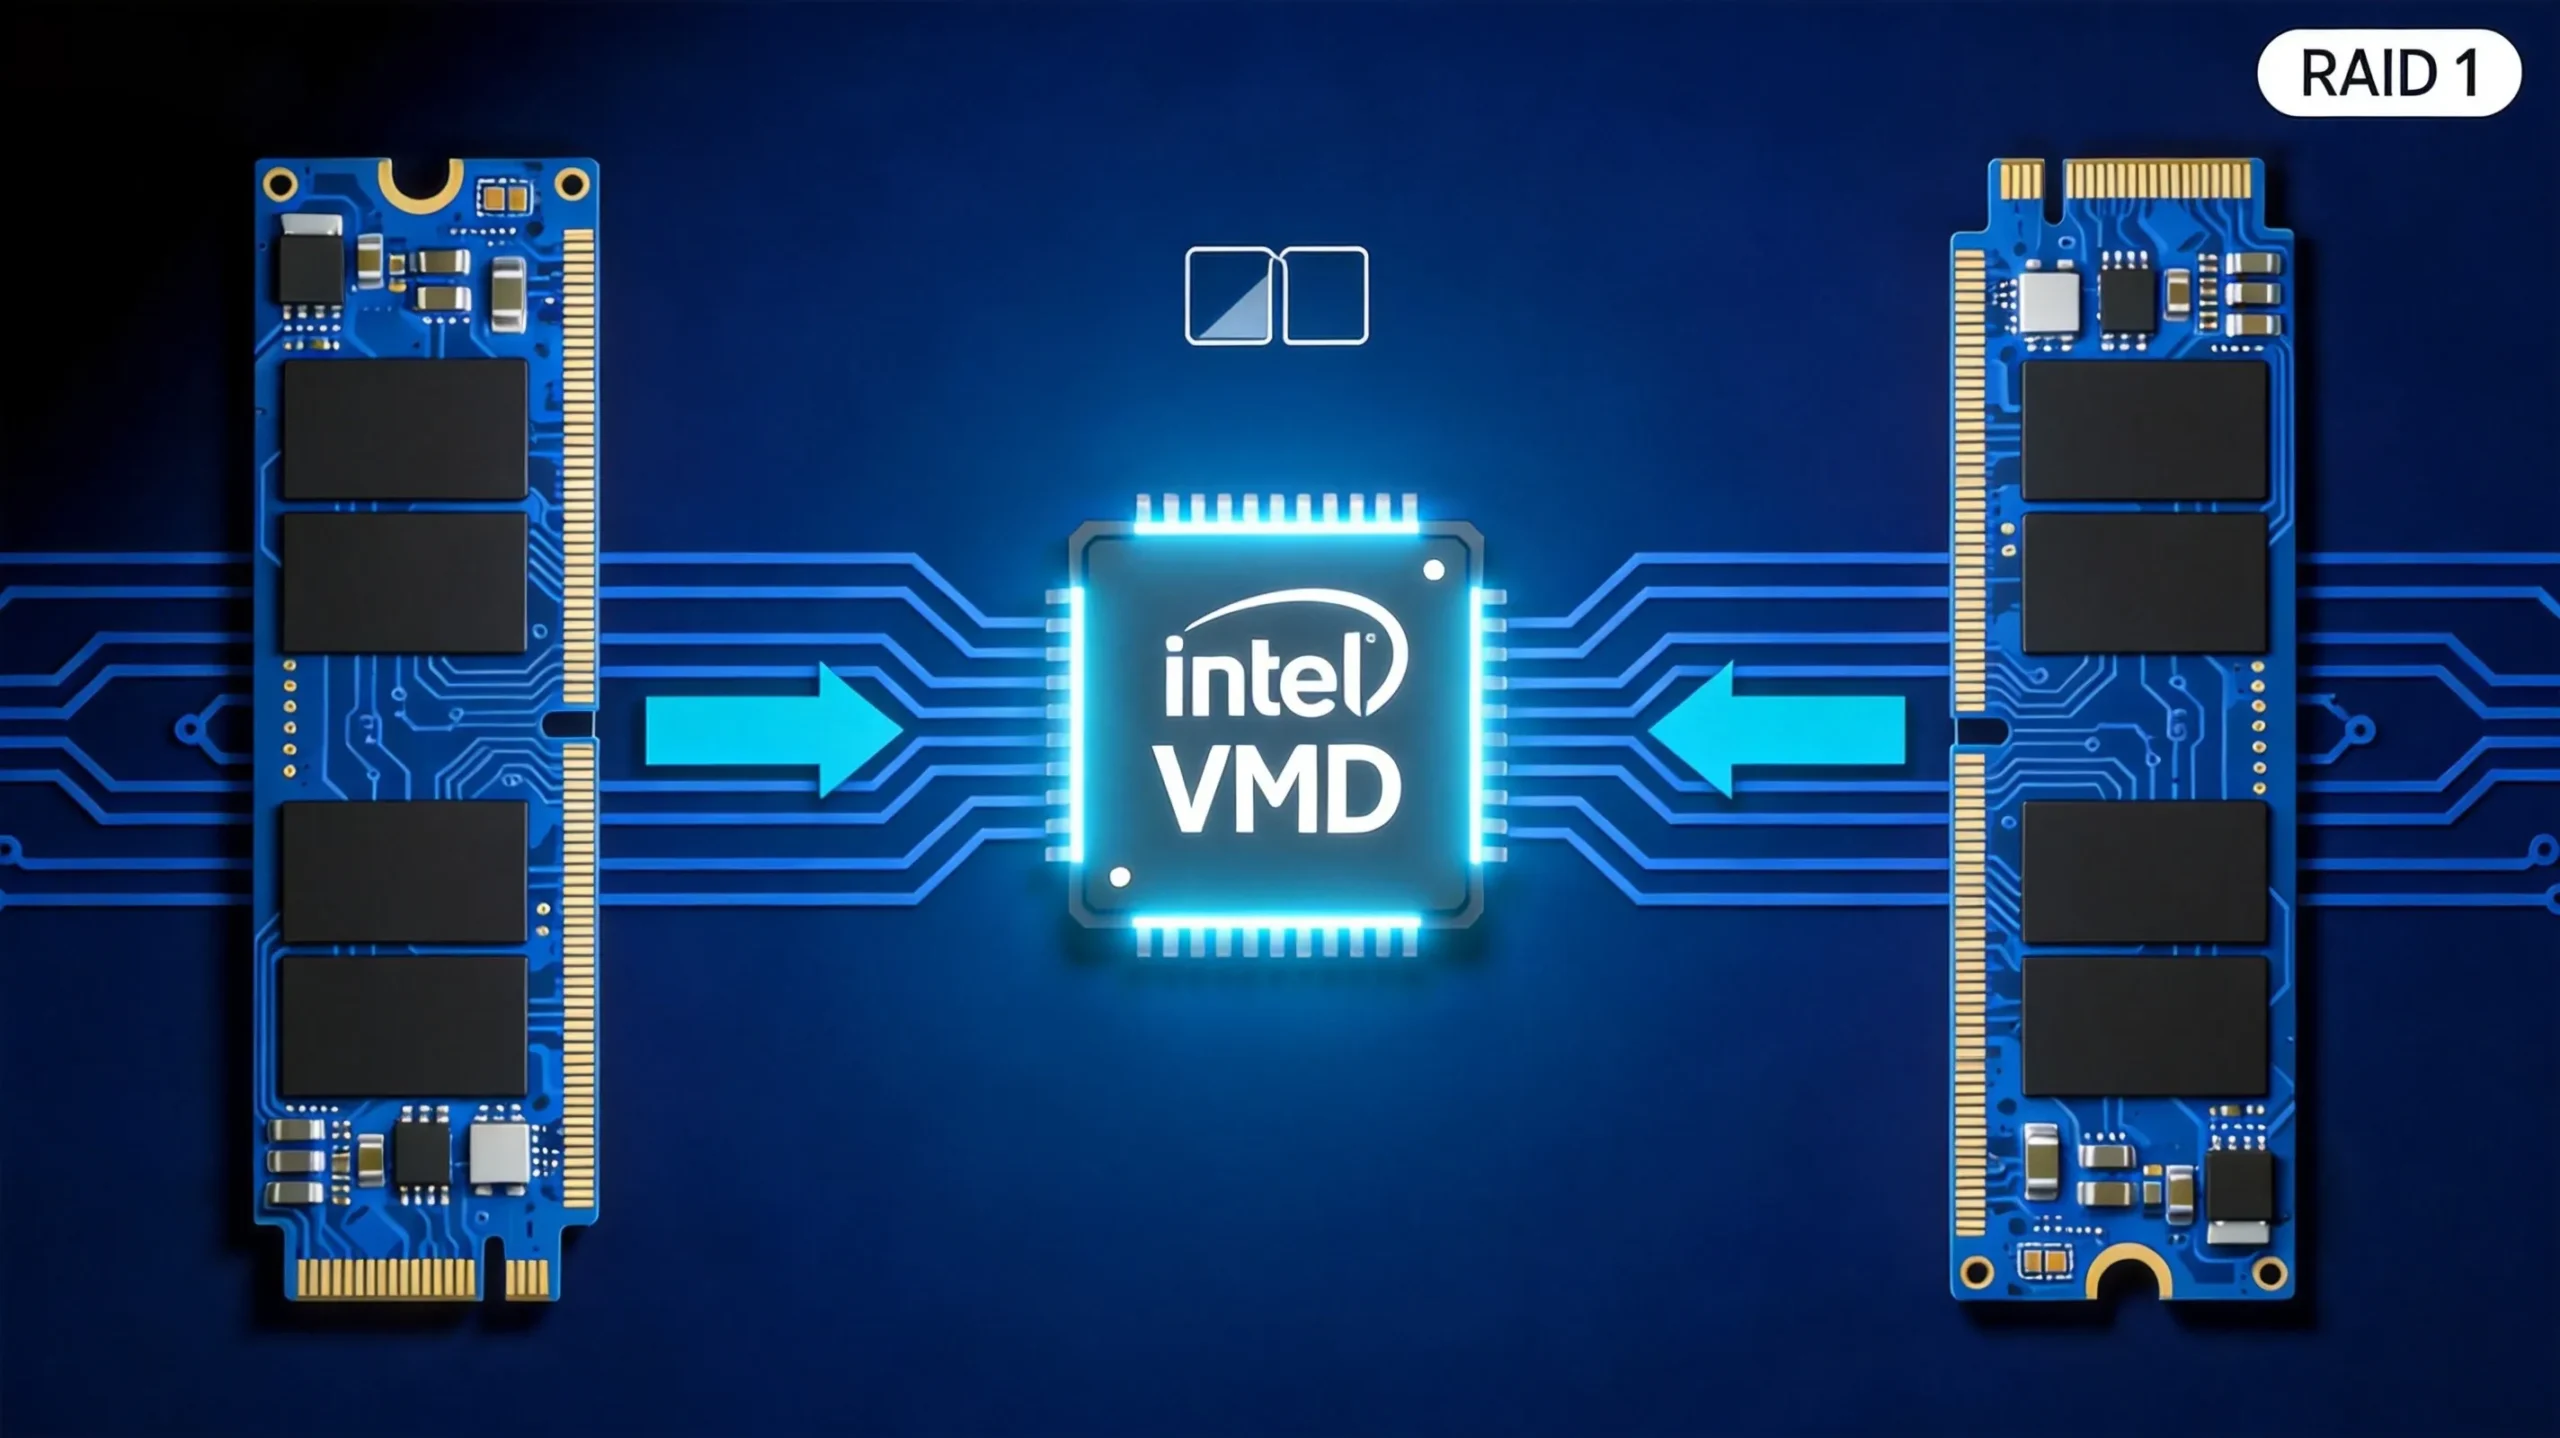
Specifically, VMD delivers three key benefits:
| Benefit | What It Means for You |
|---|---|
| Simplified management | The operating system loads a single VMD driver. Therefore, it can recognize and manage all NVMe SSDs under the VMD controller — no need to install separate drivers for each drive. |
| Maximized performance | NVMe SSDs communicate directly with the CPU through VMD. As a result, this bypasses the traditional chipset or standalone RAID card, which significantly reduces latency and improves I/O throughput. |
| Enhanced reliability | VMD isolates disk errors from the operating system. Consequently, it prevents system crashes or blue screens caused by drive failures. This makes it ideal for 24/7 industrial control and edge computing environments. |
This guide uses RAID 1 for the walkthrough. However, the setup steps are identical for other RAID levels. You only need to select a different level during configuration.
What You Need Before You Start
Make sure you have everything ready before proceeding. Otherwise, you may run into issues midway.
Hardware Requirements
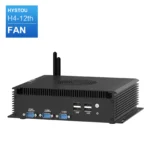
- A HYSTOU H4 12th Gen mini PC that supports Intel VMD (check that your BIOS includes VMD settings).
- Two NVMe M.2 SSDs. For best results, use identical brands, models, and capacities.
- A USB flash drive (FAT32 formatted) for the VMD driver.
- A Windows 10 or Windows 11 installation USB drive.
Critical Warning
Step-by-Step: How to Set Up RAID 1 with Intel VMD
Now, let us walk through the entire process. It consists of four main stages.
Step 1: Enable Intel VMD in BIOS
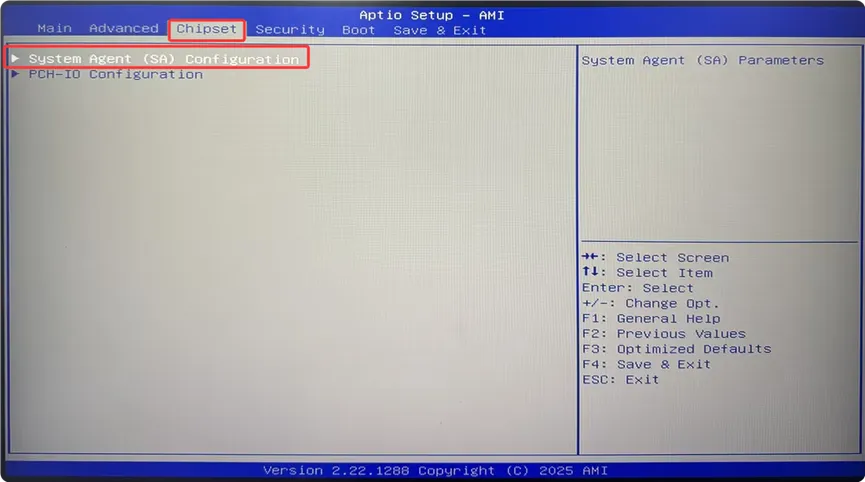
- Power on the mini PC. When the boot logo appears, press the
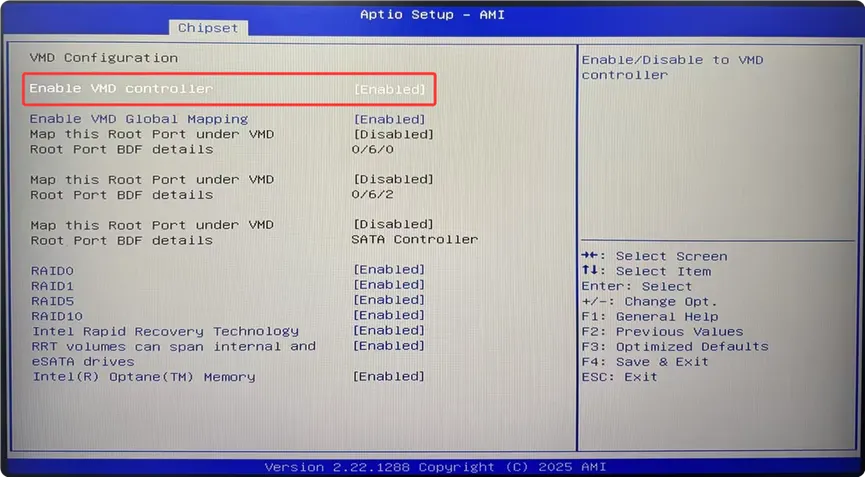
Delete(orDel) key repeatedly and quickly to enter the BIOS Setup. - Next, navigate through the following menu path:
Chipset→System Agent (SA) Configuration→VMD Setup MenuThen, find theEnable VMD Controlleroption and change its value to[Enabled]. - After that, press
F4on your keyboard. A save-and-exit dialog will appear. SelectYesorOKto confirm. The system will then reboot automatically.
Step 2: Create the RAID 1 Volume in BIOS
- Press
Delagain during boot to re-enter BIOS Setup. - Navigate to the
Advancedtab. Then, find and open theIntel(R) Rapid Storage Technologysubmenu.
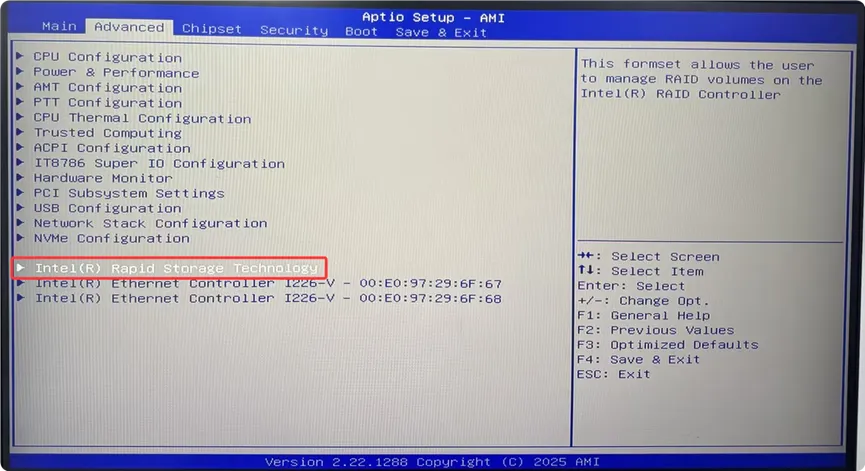
3. In the Intel RST interface, select Create RAID Volume.
4. Now, configure the RAID volume using the setup wizard:
- RAID Level: Select
RAID 1for this walkthrough. - Select Disks: Use the Spacebar on your keyboard to check both NVMe SSDs you want to include.
- Other settings: Leave stripe size and volume name at their defaults.
- Finally, select
Create Volumeand confirm.
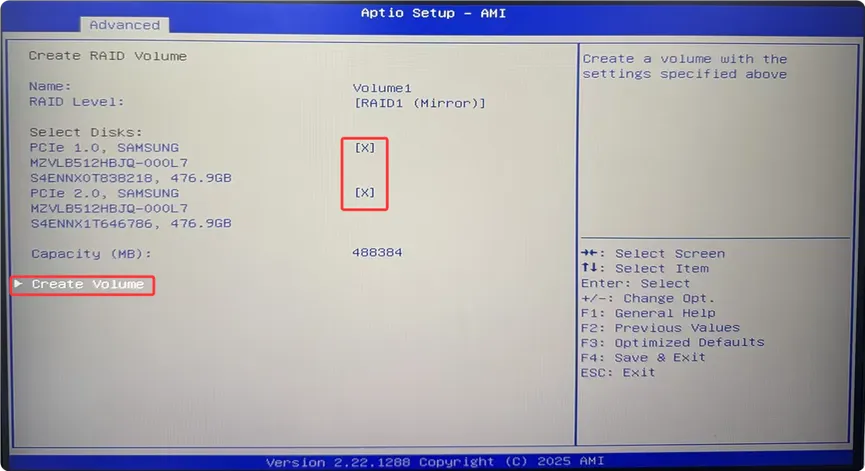
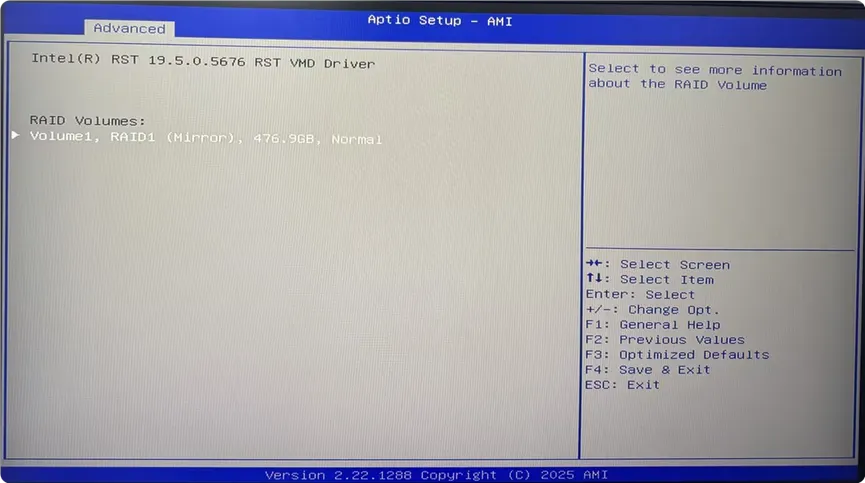
5. After creation, the Intel RST main screen will display your new RAID volume along with its status.
At this point, your RAID 1 mirrored array is ready. However, Windows still cannot see it yet. That is because you need the VMD driver. Let us get that next.
Step 3: Download and Prepare the VMD Driver (Windows)
3.1 Download the Intel RST Driver
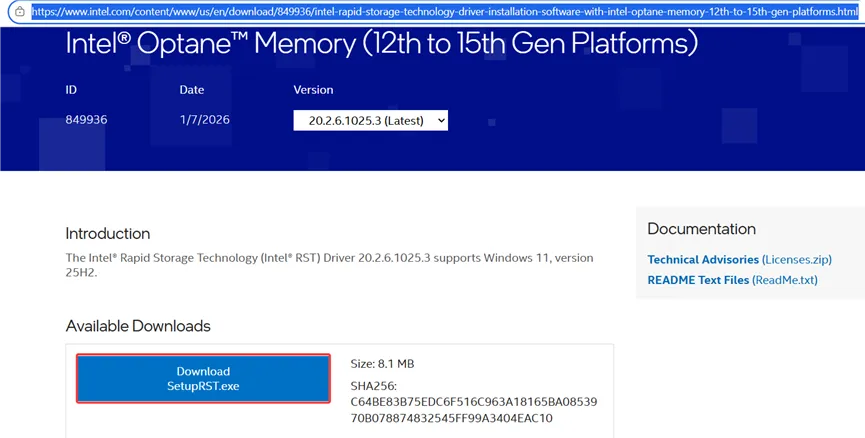
3.2 Extract the Driver Files
SetupRST.exe to your D:\ drive (or any accessible location). Then, open PowerShell or Command Prompt as administrator and run the following command:.\SetupRST.exe -extractdrivers RST_Driver
RST_Driver will appear in the current directory.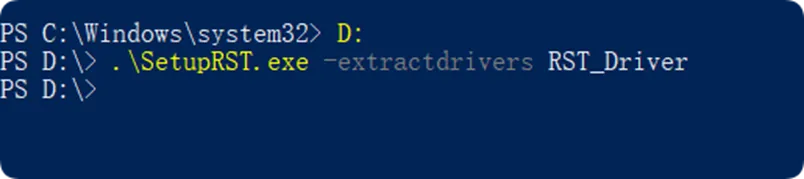
3.3 Locate the VMD Driver
iaStorVD.inf.VMD folder onto your FAT32-formatted USB flash drive. You will need it during Windows installation.- This driver supports Windows 10 and Windows 11 only.
- Linux distributions do not have official VMD drivers. If you need RAID on Linux, consider using software RAID (such as
mdadmor disable VMD mode.
Step 4: Load the VMD Driver During Windows Installation
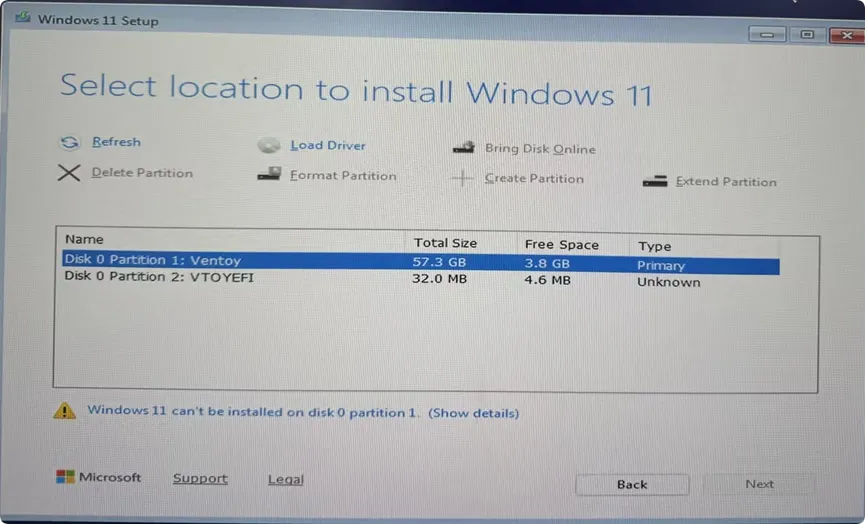
Load Driver button at the bottom-left corner of the window.Browse. Then, navigate to your USB flash drive and locate the RST_Driver\production\Windows10-x64\Drivers\VMD folder. Select it and click OK.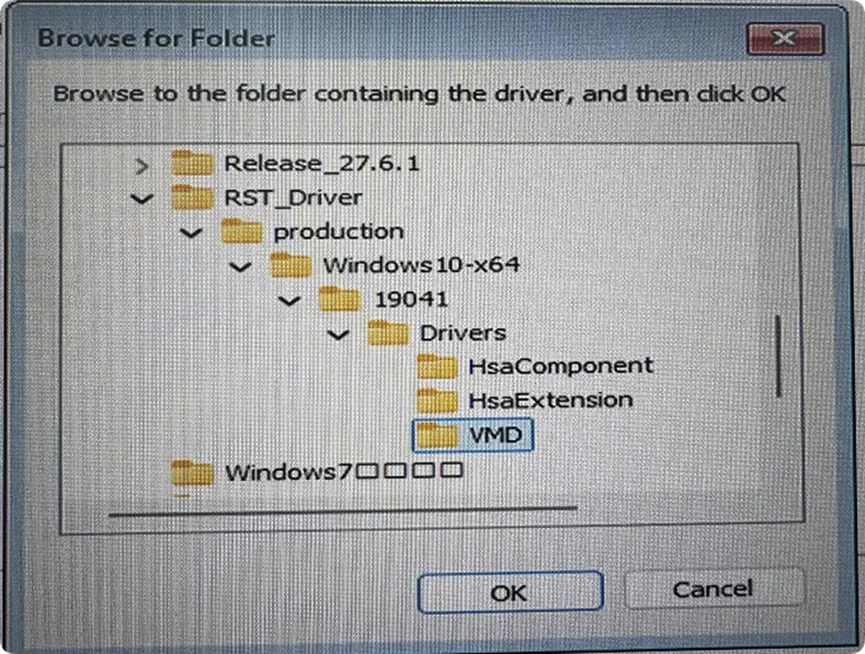
Intel RST VMD Controller (or a similarly named option), and then click Install.- If the disk is unpartitioned, click
Newto create partitions. - Select the target partition, then click
Nextto continue with the standard Windows installation.
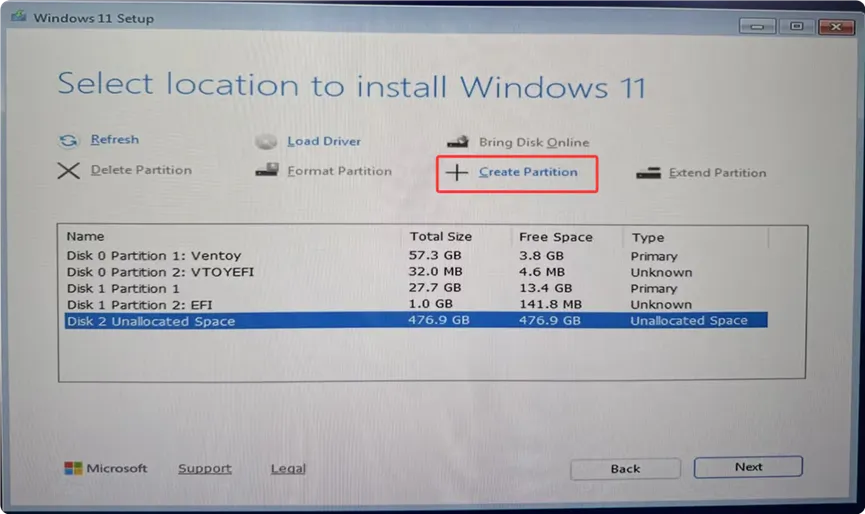
From here, Windows will install normally. Once complete, your RAID 1 mirrored array will be fully operational.
How do I check if my RAID 1 array is working properly?
Install the Intel Optane Memory and Storage Management application (or Intel RST Console) in Windows. This tool lets you view your RAID volume’s health status, sync progress, and other details.
What happens if one of my SSDs fails?
Fortunately, RAID 1 is designed for this scenario. If one drive fails, the other retains all your data, and the system keeps running. To recover, simply replace the failed drive with a new one. Then, enter the Intel RST interface in BIOS, select the RAID volume, and run the Rebuild operation. The system will automatically mirror data from the healthy drive to the new one.
Can I enable Intel VMD after Windows is already installed?
Technically, yes. However, the process is complex. You would need to enable VMD in BIOS first, then install the corresponding driver within Windows. Therefore, we strongly recommend completing all RAID configuration before installing the operating system.
Can I move a RAID volume to a different computer?
Generally, no. Since VMD is tied to the CPU, RAID volumes cannot be directly transferred to non-Intel platforms or different CPU generations. Therefore, always back up your data before changing hardware.
Is RAID 1 better than RAID 0?
It depends on your priorities. If data safety matters most, RAID 1 is the better choice. On the other hand, if you need maximum speed and can afford to lose data, RAID 0 may suit you better. For more details, see the RAID 0 vs. RAID 1 comparison table above.
Does Intel VMD work with Linux?
Currently, Intel does not provide official VMD drivers for Linux. However, you can still set up RAID on Linux using software RAID solutions like mdadm. Alternatively, you may disable VMD mode in BIOS and use standard NVMe passthrough.
What is the difference between Intel VMD and Intel RST?
Intel VMD manages the hardware-level connection between NVMe drives and the CPU. Meanwhile, Intel RST (Rapid Storage Technology) provides the software interface for creating and managing RAID volumes. In practice, they work together — VMD handles the hardware layer, and RST handles the configuration layer.
Summary
- Intel VMD simplifies NVMe management, boosts performance, and enhances reliability.
- RAID 1 provides full data redundancy — ideal for critical workloads.
- The setup involves four key steps: enabling VMD in BIOS, creating the RAID volume, preparing the VMD driver, and loading it during Windows installation.

Author: Nick FU
Marketing Specialist | HYSTOU Mini PC & Network Appliance Manufacturer
HYSTOU has established its R&D headquarters in Shenzhen, drawing on over a decade of experience. Our core team members, who previously served at renowned companies such as Inventec and Quanta Computer, form the backbone of our technical expertise. With robust R&D and innovation capabilities, we remain steadfast in our commitment to pursuing excellence in the field of technology products.