
Why Fanless Mini PCs are Essential for Dusty Manufacturing in 2025 | HYSTOU
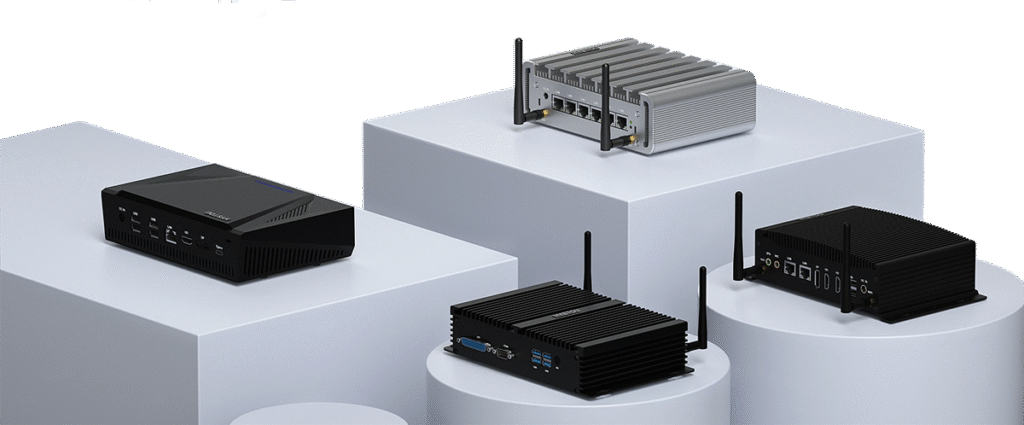
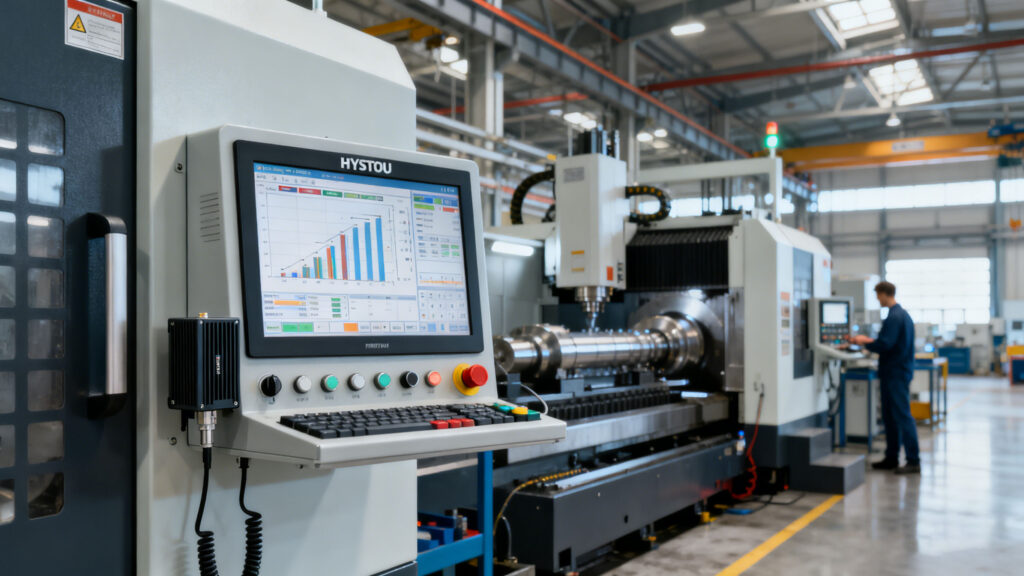
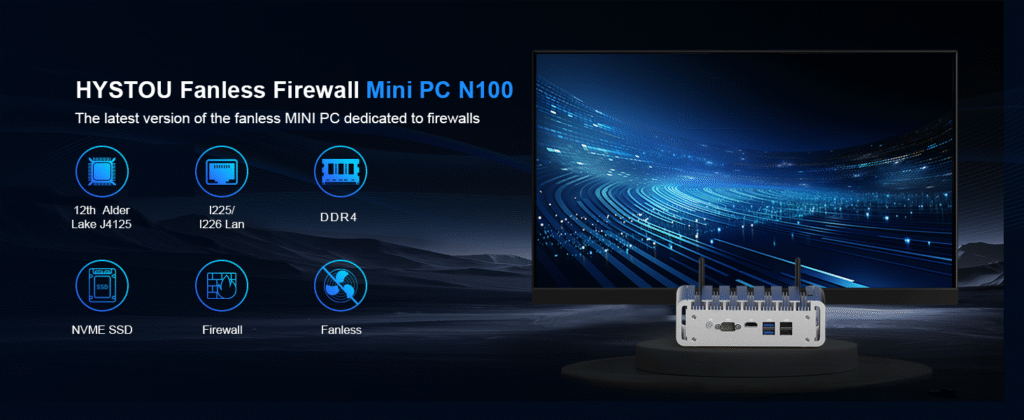
Why Fanless Mini PCs are Essential for Dusty Manufacturing Environments in 2025 Announcements Buyer Guide Comprehensive Tips Occasion Product Review Q&A Tutorials As we navigate through 2025, the manufacturing sector is more automated and data-driven than ever before. From CNC machining centers to textile processing plants, the demand for reliable edge computing is skyrocketing. However, these environments present a unique challenge: airborne particulates. For factory managers and IT procurement specialists, choosing the right hardware is critical. This is where the Fanless Mini PC becomes not just an option, but a necessity. Unlike traditional towers that gasp for air, HYSTOU industrial computers offer a sealed, robust solution designed to survive where others fail. The Hidden Enemy: How Dust Destroys Hardware In a standard computer, fans are the lifeline. They pull cool air in to regulate temperature. Unfortunately, in a factory setting, they also pull in dust, metal shavings, oil mist, and textile fibers. Over time, this creates a “thermal blanket” on the motherboard and CPU. The result? Overheating: The CPU throttles down, slowing production software. Short Circuits: Conductive metallic dust bridges circuits, causing permanent failure. Mechanical Failure: The fan bearing itself seizes up due to grit. By 2025 standards, unplanned downtime is too costly. A Silent Mini PC without moving parts eliminates this risk entirely. The HYSTOU Fanless Advantage: Engineered for Resilience HYSTOU has positioned itself as a leader in industrial computing by addressing these exact pain points. A Fanless Mini PCutilizes a passive cooling system. The chassis itself—typically constructed from high-quality aluminum alloy—acts as a giant heatsink. 1. Zero Dust Ingress Because there is no need for airflow intake, the casing is sealed. Dust, dirt, and moisture remain on the outside, ensuring the internal components stay pristine for years. 2. Vibration Resistance and Silence A Silent Mini PC implies no noise, which is great for operators, but technically it means no moving parts. In manufacturing, equipment often vibrates. Traditional fans and spinning HDDs fail under vibration. HYSTOU’s fanless designs, combined with SSD storage, offer superior shock resistance. Recommended for 2025: HYSTOU Mini PC Based on the current industrial demands, here are the top picks from the HYSTOU Mini PC lineup The Rugged Workhorse: HYSTOU H4 Industrial Series Best For: Heavy industrial machinery, CNC control, and outdoor kiosks. Why it wins: The H4 series typically features a fully enclosed, heavy-duty chassis. It supports wide operating temperatures, making it immune to the sweltering heat of a foundry or the cold of a logistics warehouse. Key Specs: multiple COM ports (RS232/485) for legacy equipment connection. Hystou Fanless Mini PC H4T-10th Processor: Intel 10th Gen i5-10210U/i5-10310U / i7-10710U(up to 4.4GHz Turbo, 15W TDP) Graphics: Intel UHD Graphics Memory: 2×DDR4 SODIMM slots (max 64GB) Storage: 1×M.2_2280 SATA SSD slot (up to 2TB) Network: 2×Gigabit RJ45 LAN, Intel 802.11ac dual-band WiFi (Bluetooth 4.2) Display Output: HDMI/EDP/Type-C triple display support Fanless design for silent operation Aluminum alloy casing for industrial environments Click to view details The Compact Controller: HYSTOU H4-4th Series Best For: AGV (Automated Guided Vehicles), visual inspection arms, and tight spaces.Why it wins: Small footprint with powerful Intel Core processing power. It delivers the performance of a desktop without the bulk or the dust vulnerability. HYSTOU H4 Triple Display Processor: Intel 8th Gen Core i5-8250U/i7-8550U (TDP 15W) Graphics Card: Intel UHD Graphics 620 Memory: 2×DDR4 260Pin SODIMM slots/Max 64GB (2400MHz) Storage: 1×SATA3.0 port (supports 2.5-inch HDD/SSD, up to 6TB)/1×M.2 2280 PCIe 3.0 x2 slot (NVMe/SATA compatible) Network: Dual Intel 1210/211 Gigabit Ethernet ports/M.2 E-key (WiFi 5+BT4.2, optional WiFi 6+BT5.2) Click to view details Industrial Automation With a wide operating temperature range (-20°C to +50°C) and stable performance, it is an ideal choice for factory automation, process control systems, and industrial monitoring applications. Its fanless design eliminates the risk of dust accumulation, ensuring reliable operation in manufacturing environments. HYSTOU Fanless Industrial Mini PC H3 Graphics Card: Intel UHD Graphics (supports 4K resolution) Memory: DDR4 SODIMM slot, max 32GB @ 3200MHz Storage: M.2 NVMe slot (up to 2TB) MSATA slot (up to 1TB) SATA 3.0 interface (compatible with 2.5-inch HDD/SSD, ≤7mm thickness) Network: Dual Gigabit Ethernet (Realtek RTL8168/8111 controllers) Additional Features: Fanless design for silent operation Dual display outputs: HDMI 2.0 (4K@60Hz) + VGA (1080P@60Hz) Click to view details Conclusion: Investing in Reliability In 2025, your manufacturing hardware should solve problems, not create them. Switching to a HYSTOU Fanless Mini PC is an investment in uptime. By removing the fan, you remove the most common point of failure in dusty environments. Ready to upgrade your production line? Explore the full range of industrial solutions offered by the HYSTOU Mini PC product series. HYSTOU HYSTOU has established its R&D headquarters in Shenzhen, drawing on over a decade of experience. Our core team members, who previously served at renowned companies such as Inventec and Quanta Computer, form the backbone of our technical expertise. With robust R&D and innovation capabilities, we remain steadfast in our commitment to pursuing excellence in the field of technology products. Facebook Twitter Youtube Tumblr HYSTOU K4 Dual Display Mini Computer Industrial Fanless Mini PC | Intel 10th Gen i5 | Hystou H4T-10th HYSTOU H6 Fanless Industrial Mini PC HYSTOU Fanless Industrial Mini PC H3
Why Fanless Mini PCs are Essential for Dusty Manufacturing in 2025 | HYSTOU Read More »