How to Use MemTest86 to Check RAM Functionality: A Comprehensive Guide
Is your computer crashing randomly? Experiencing blue screens of death? These issues often trace back to faulty RAM, but diagnosing memory problems can feel like guesswork without the right tools. MemTest86 has been the gold standard for RAM testing since 1994, trusted by IT professionals and hardware enthusiasts worldwide. In this updated 2025 guide, we’ll walk you through using this powerful tool to identify memory errors before they cause permanent damage to your system. This comprehensive tutorial covers everything from creating bootable media to interpreting advanced test results, making MemTest86 accessible for both beginners and IT professionals.
Why RAM Testing Matters in 2025
With modern systems supporting up to 256GB of DDR5 RAM running at speeds exceeding 8000MHz, memory-related issues have become more complex to diagnose. A single corrupted bit can cause system instability, data corruption, or application crashes. According to a 2024 study by hardware analysis firm Puget Systems, 37% of unexplained system crashes are caused by faulty RAM modules—making memory testing an essential troubleshooting step for both professionals and casual users.
Creating a Bootable MemTest86 Drive
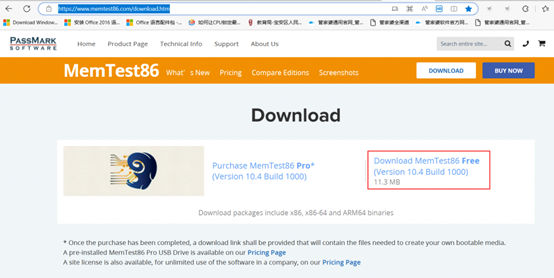
- Visit the official MemTest86 website (www.memtest86.com) and download the USB image file
- Insert your USB flash drive into an available port
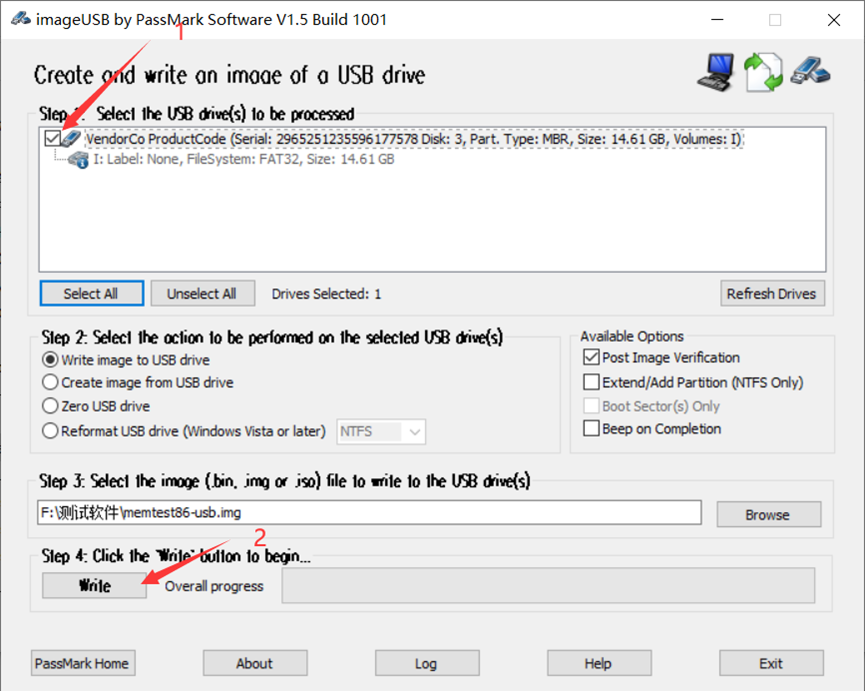
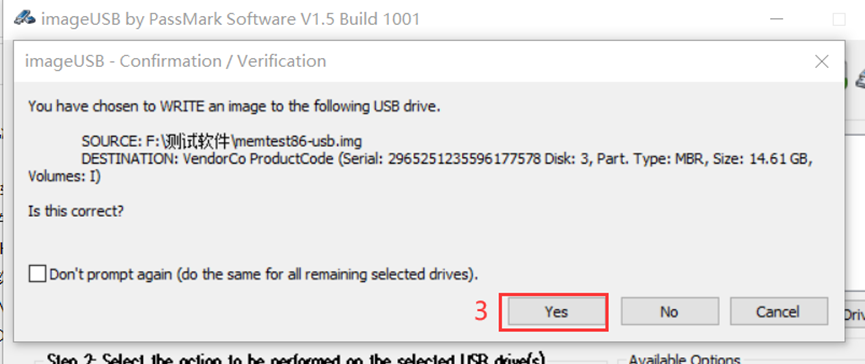
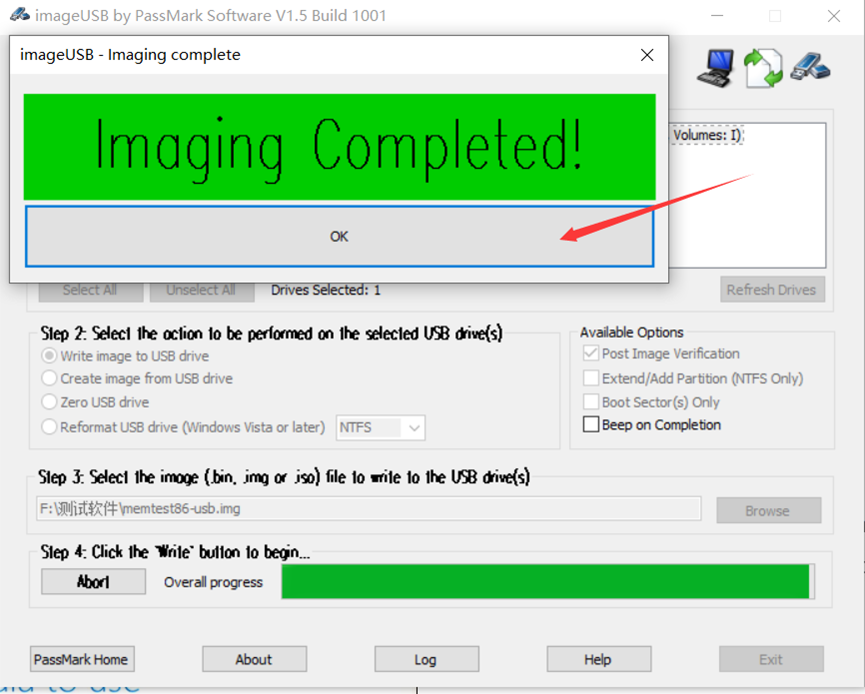
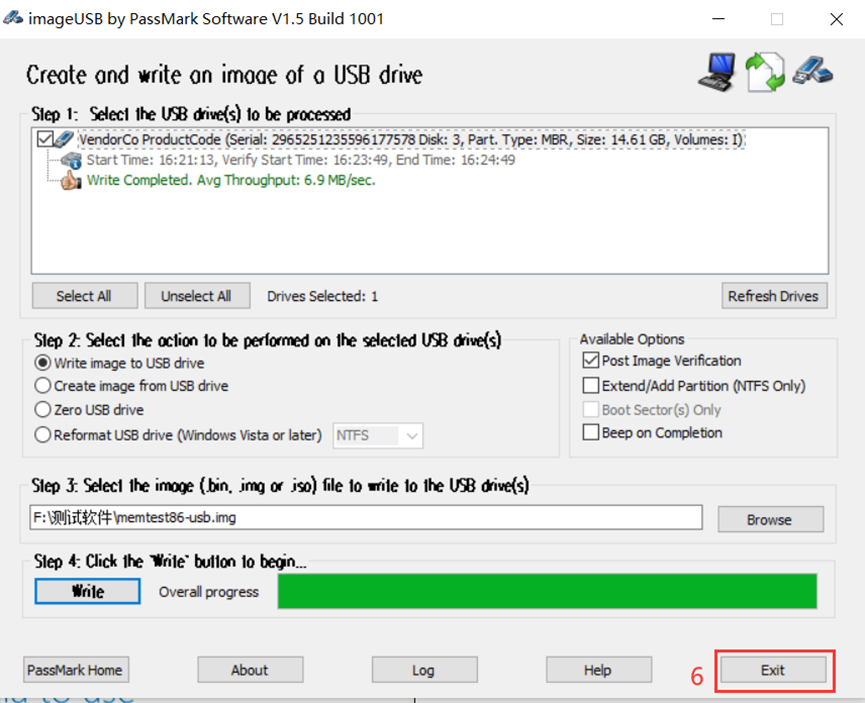
- Use the MemTest86 USB Creator tool to write the image to your drive
- Safely eject the USB drive when the process completes
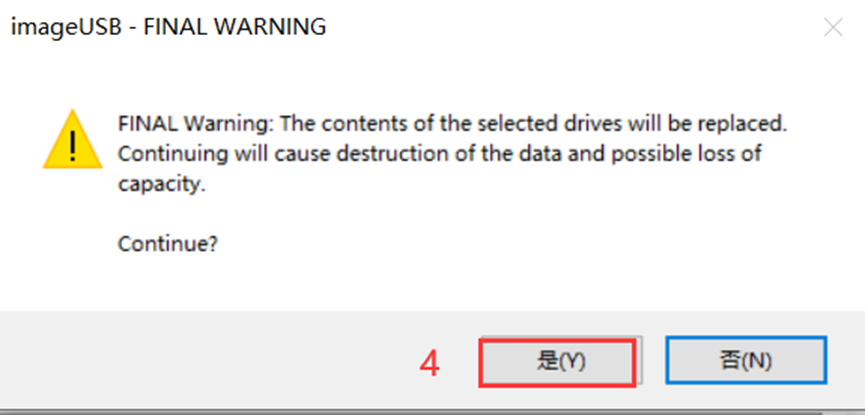
Pro tip: Use a dedicated USB drive for MemTest86, as the creation process will erase all existing data on the drive.
Step-by-Step Testing Process
Once you’ve created your bootable drive, follow these steps to test your RAM:
Booting from the USB Drive
- Power off your computer completely
Insert the MemTest86 USB drive
Power on the system and immediately press the boot menu key (varies by manufacturer):
- Dell: F12
HP: F9
Lenovo: F12 or Novo button
ASUS: F8
Acer: F12
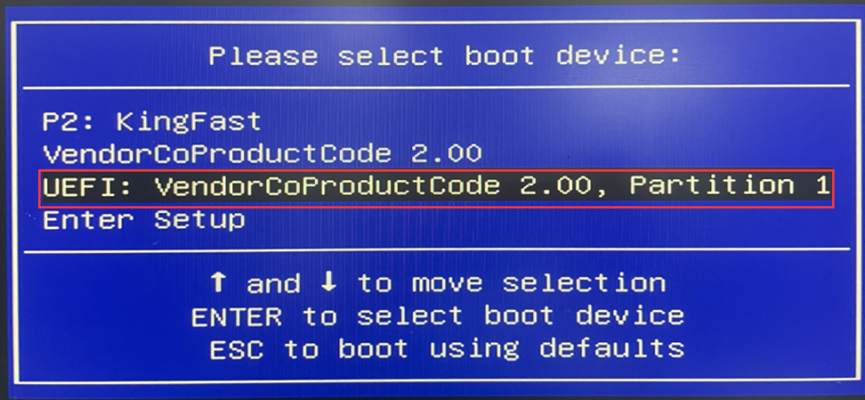
Select the MemTest86 USB drive from the boot menu
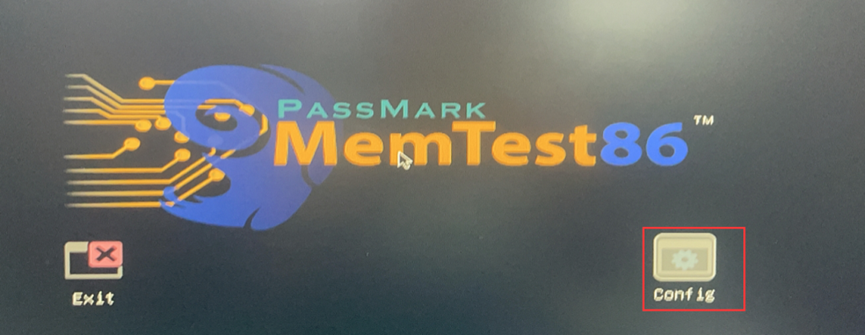
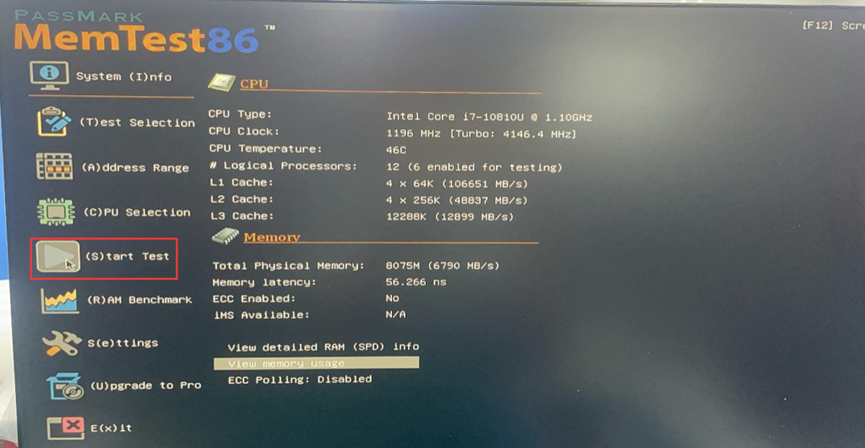
The tool will automatically load and display the main interface
Configuring Test Settings
The default settings work well for most users, but you can customize the testing process by pressing F1 to access the configuration menu:
Test Selection: Choose between Quick Test (10 minutes), Standard Test (1 hour), or Extended Test (4+ hours)
CPU Selection: For multi-processor systems, select which CPUs to use for testing
Address Range: Limit testing to specific memory regions if needed
Error Injection: Advanced option to simulate memory errors (Pro version only)
Running the Tests
- From the main menu, select “Start Test” (option 5)
- The tool will begin running through 13 different test patterns designed to stress your memory
- Monitor the progress indicators:
- Pass: Number of complete test cycles
- Test: Current test pattern (1-13)
- Errors: Count of detected memory errors
5. Let the test run for at least 4 passes for reliable results (typically 2-4 hours)
Critical note: Even a single error indicates a problem with your RAM. For mission-critical systems, we recommend running the extended test overnight.
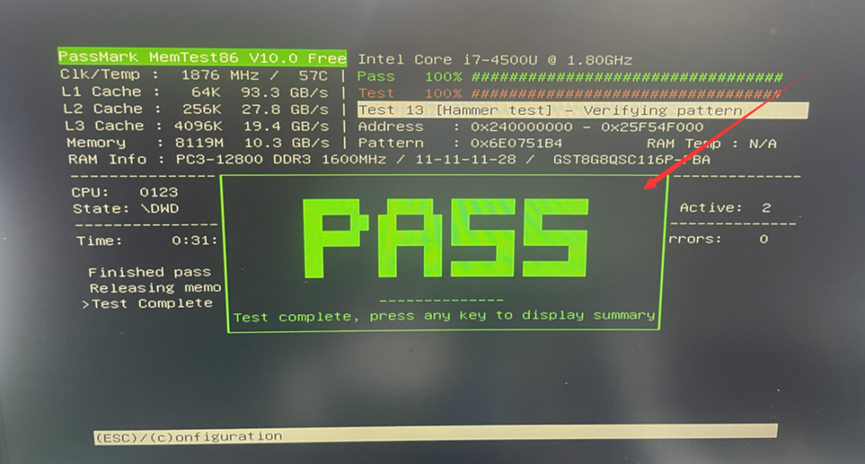
Interpreting Test Results
After completing the tests, you’ll see one of two outcomes:
No Errors Detected
If MemTest86 reports zero errors after multiple passes, your RAM is likely functioning correctly. This doesn’t completely rule out memory issues, but makes other hardware or software problems more likely causes for your system instability.
Errors Detected
Any errors during testing indicate memory problems. The results screen will show:
Failing Address: Specific memory location(s) with errors
Error Bits: Which bits in the memory word are failing
Count: Number of errors detected
Test Pattern: Which test identified the problem
Troubleshooting Faulty RAM
If errors appear, try these troubleshooting steps:
Basic Troubleshooting
Reseat the RAM modules: Power down, open your system, remove and reinsert the RAM sticks
Clean contacts: Use a pencil eraser to gently clean the gold contacts on the RAM modules
Test individual sticks: If you have multiple RAM modules, test them one at a time to identify the faulty module
Check seating: Ensure modules are fully inserted and locking tabs are engaged
Advanced Solutions
Update BIOS/UEFI: Manufacturers often release updates that improve memory compatibility
Adjust RAM settings: In BIOS, try reducing memory speed or loosening timings
Test in different slots: Faulty memory slots can sometimes be mistaken for faulty RAM
Contact the manufacturer: Most RAM modules include lifetime warranties for replacement
Best Practices for Reliable Testing
To ensure accurate results, follow these guidelines:
Close all applications: If testing from within an OS (not recommended), shut down all background processes
Disable overclocking: Return CPU and memory to default speeds before testing
Maintain proper cooling: Overheating can cause temporary memory errors
Test overnight: For critical systems, run the extended test for maximum confidence
Document results: Save error reports for reference when contacting technical support
When to Replace Your RAM
Consider replacing your memory modules if:
Errors persist after reseating and cleaning
Specific modules consistently show errors
Errors occur in multiple slots with different modules
Your system is experiencing frequent crashes or data corruption
RAM is approaching or exceeding its expected lifespan (typically 5-7 years)
Conclusion
Regular RAM testing with MemTest86 is a critical maintenance task that can prevent data loss and system downtime. By following this guide, you can accurately diagnose memory issues and take appropriate action before small problems become major failures.
Remember that even high-quality RAM can fail, and early detection is key to preventing catastrophic data loss. For system administrators and power users, we recommend incorporating MemTest86 into your regular maintenance schedule, especially after hardware upgrades or system instability.
Have you successfully diagnosed memory issues using MemTest86? Share your experience in the comments below!
For reliable industrial computers and memory solutions, visit Hystou Industrial PCs

HYSTOU
HYSTOU has established its R&D headquarters in Shenzhen, drawing on over a decade of experience. Our core team members, who previously served at renowned companies such as Inventec and Quanta Computer, form the backbone of our technical expertise. With robust R&D and innovation capabilities, we remain steadfast in our commitment to pursuing excellence in the field of technology products.