
![mount1_thumb[1][1]](https://hystou.com/wp-content/uploads/elementor/thumbs/mount1_thumb11-relbd3h0bu9l57z5s0lx66eg2h326o9thybabart4c.jpg "mount1_thumb[1][1]")
![mount2_thumb[1][1]](https://hystou.com/wp-content/uploads/elementor/thumbs/mount2_thumb11-relbd4euioavgtxsmj0jqo5wnuyfeddju2yrskqey4.jpg "mount2_thumb[1][1]")
![mount3_thumb[1][1]](https://hystou.com/wp-content/uploads/elementor/thumbs/mount3_thumb11-relbilsydvt36xz2lwc7aacperxiat56l7yqkolqng.jpg "mount3_thumb[1][1]")
![mount4_thumb[1][1]](https://hystou.com/wp-content/uploads/elementor/thumbs/mount4_thumb11-relbimqskpudijxpgeqtus4605svii8wxcm81ykch8.jpg "mount4_thumb[1][1]")
![mount5_thumb[1][1]](https://hystou.com/wp-content/uploads/elementor/thumbs/mount5_thumb11-relbn4f187zozhev8cmnrnbg6fo0ag2qvktqljwmr0.jpg "mount5_thumb[1][1]")
![mount6_thumb[1][1]](https://hystou.com/wp-content/uploads/elementor/thumbs/mount6_thumb11-relbn5cvf20zb3di2v1ac52wrtjdi56h7ph82tv8ks.jpg "mount6_thumb[1][1]")


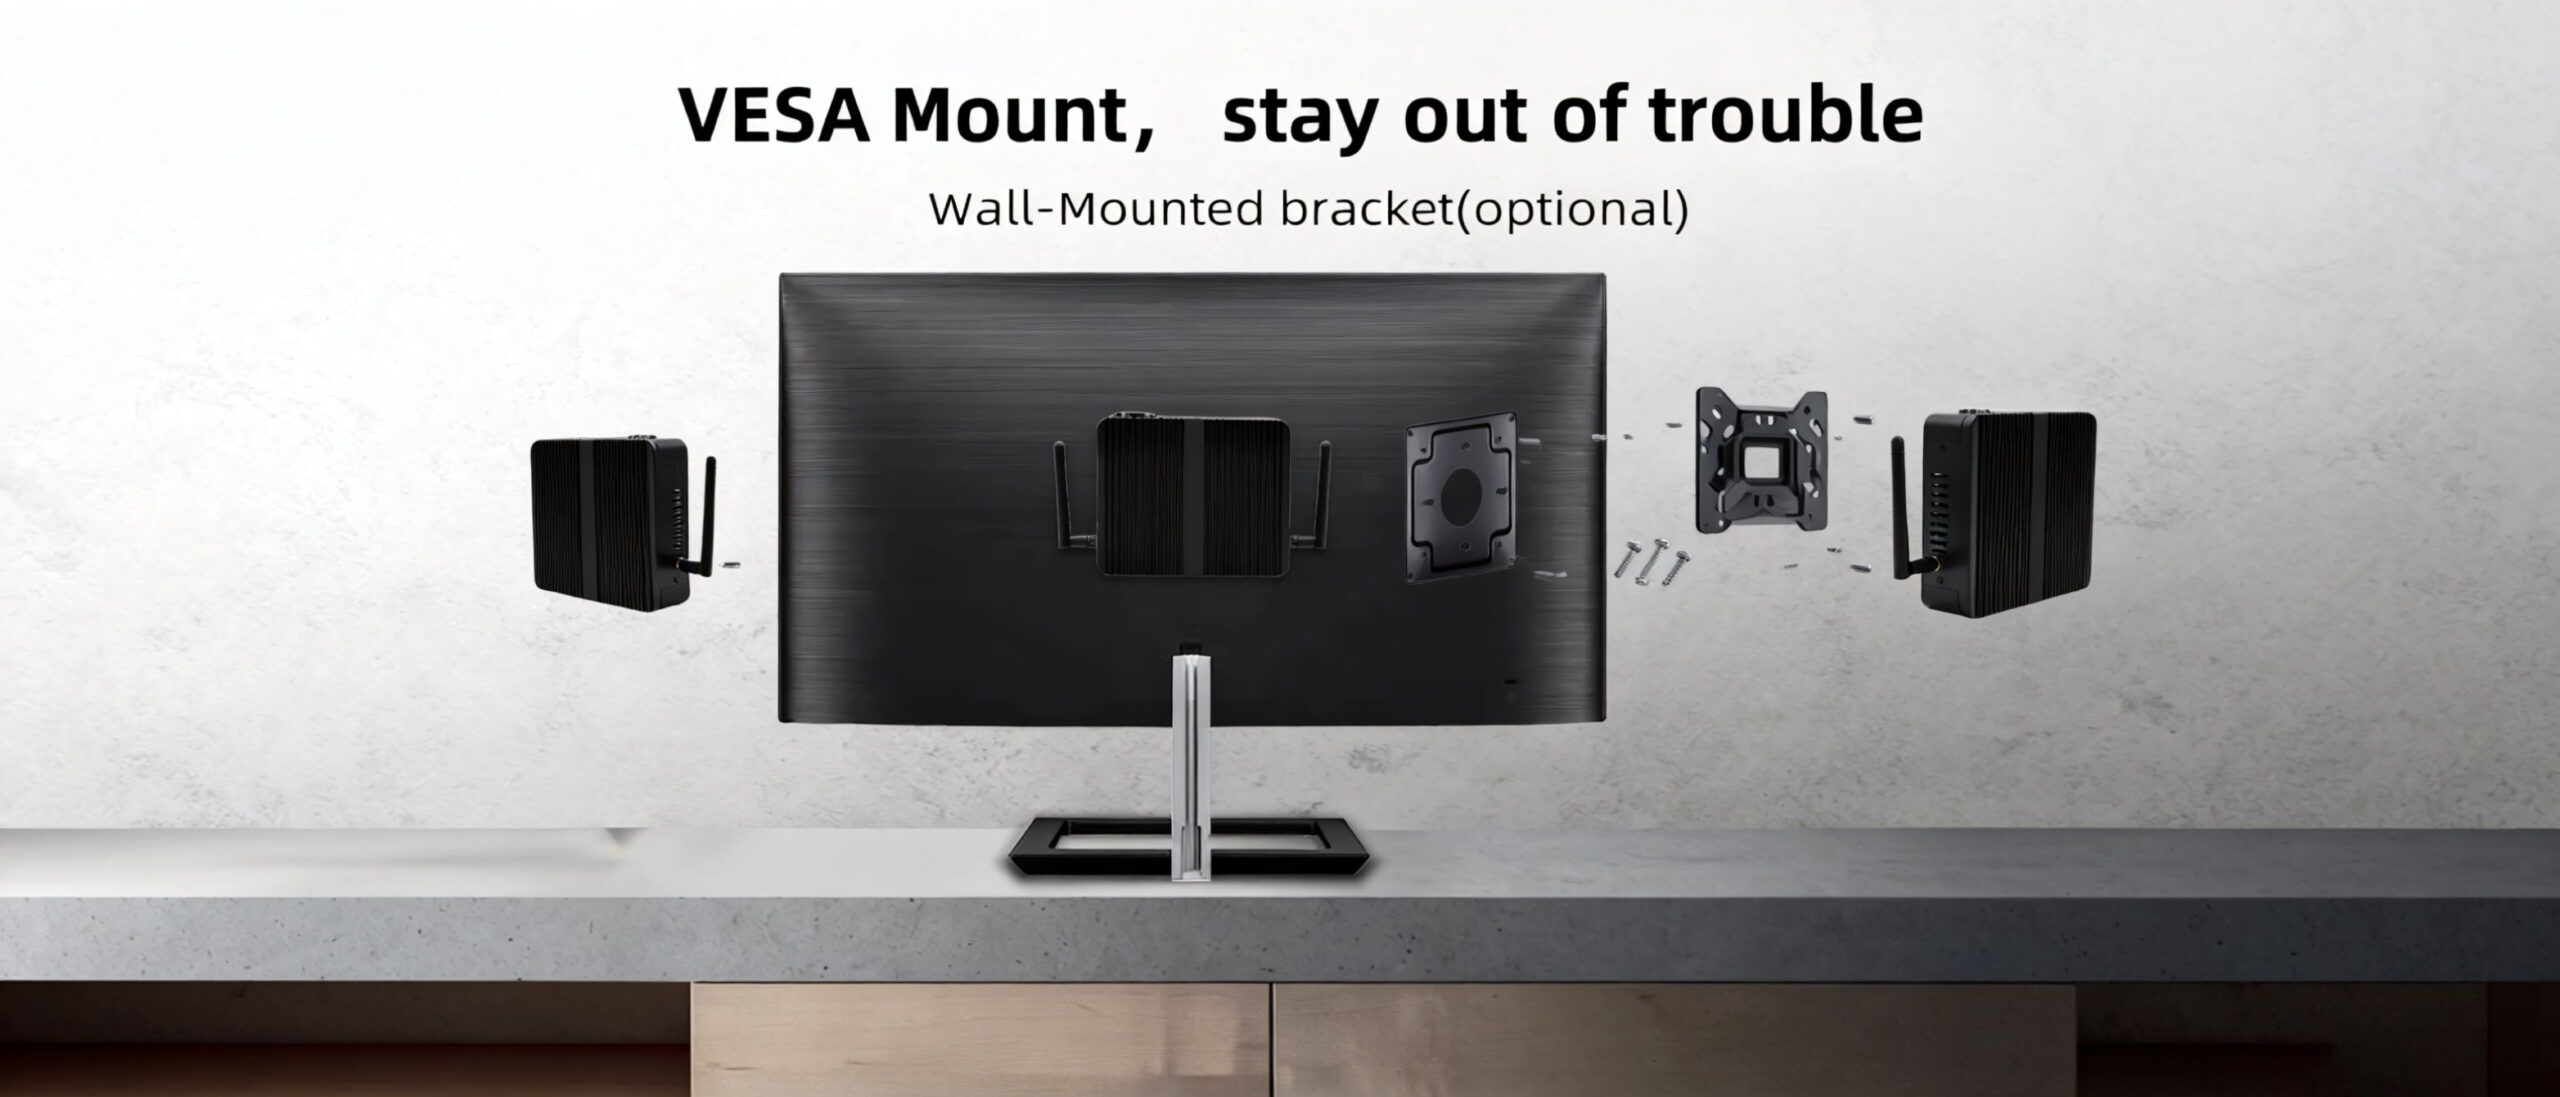
These setup steps are suitable for the Hystou mini pc tower, including the C1037U Core i3 and i5 mini computer models, which use the same back computer case.
1. Check the following VESA Mount. This VESA Mount is not supplied for free; please purchase it with the mini computer directly.
3. Fix the Bracket back of the Monitor.
4. Mount the Mini PC with the backet.
HYSTOU
HYSTOU has established its R&D headquarters in Shenzhen, drawing on over a decade of experience. Our core team members, who previously served at renowned companies such as Inventec and Quanta Computer, form the backbone of our technical expertise. With robust R&D and innovation capabilities, we remain steadfast in our commitment to pursuing excellence in the field of technology products.
Recently, scammers have been impersonating our company staff to commit payment fraud. To protect your interests, please pay attention to the following matters:
Verify Sender: Check if the email domain is @hystou.com. Immediately delete any emails from non-Hystou domains.
Double-Check: For any account modification requests, cross-verify via the customer service hotline listed on our official website hystou.com or through existing partnership channels.
Refuse Private Transactions: Do not trust claims like “urgent notifications,” “confidentiality requirements,” or “tax policy updates.” All business changes must follow official procedures.